Advanced Conversation Design: Mastering the Workflow Canvas
While a simple prompt and a strong knowledge base form the foundation of any AI agent, the Workflow Canvas is the control center where you architect truly intelligent conversational experiences. It moves your agent beyond basic Q&A and empowers you to design dynamic, multi-turn dialogues that can understand user intent, perform specific tasks, and achieve defined goals. This article provides an in-depth exploration of the concepts and components that make the Workflow Canvas the most powerful feature in the Intervo.ai platform.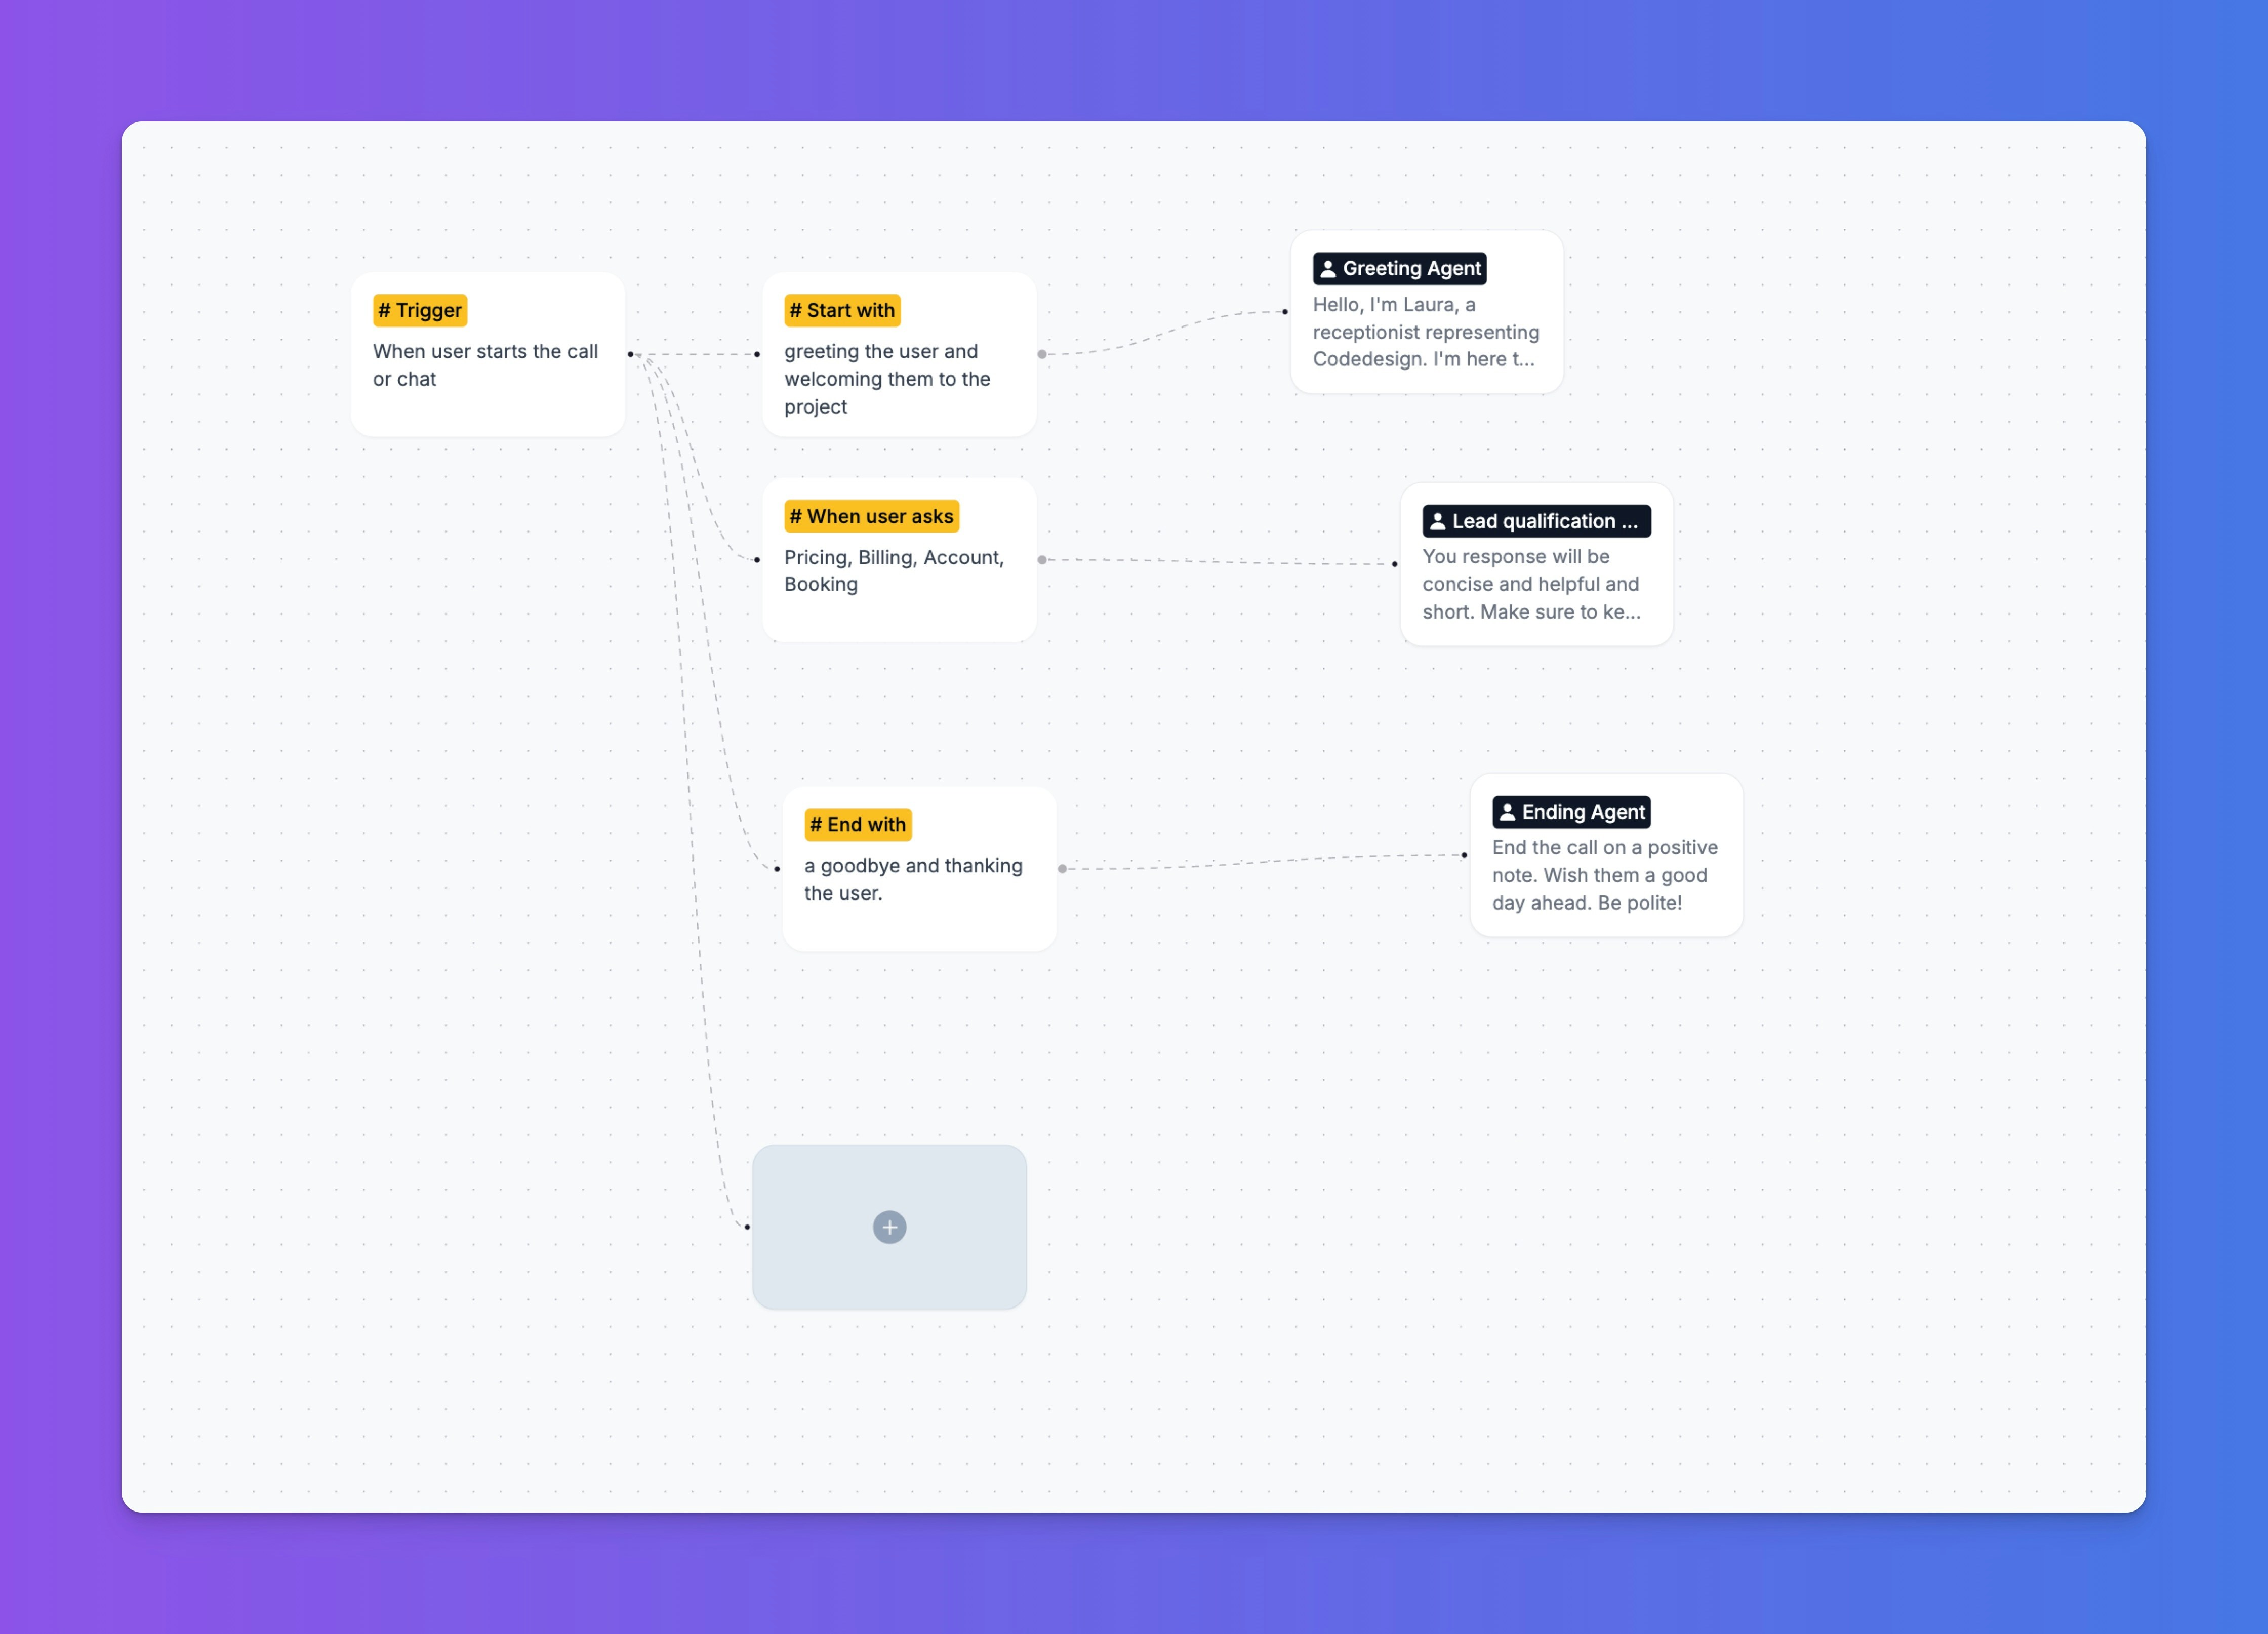
The Philosophy: A Team of Specialists
The core principle of the Workflow Canvas is moving away from a single, monolithic agent that tries to do everything. Instead, you create a team of highly specialized sub-agents, each with a single, clear responsibility. Think of your main agent as a project manager. The sub-agents are the team members:- One sub-agent is the Receptionist (
Greeting Agent), whose only job is to welcome the user. - Another is the Sales Development Rep (
Lead qualification), focused solely on gathering contact information. - A third is the Support Expert (
Customer Support Agent), trained to answer questions on specific topics. - A final one is the Closer (
Ending Agent), who politely concludes the conversation.
The Anatomy of the Canvas: Nodes and Connections
The workflow is a visual map built from interconnected blocks called nodes. There are two primary categories of nodes: Logic Nodes and Agent Nodes.Logic Nodes: The Brains of the Operation
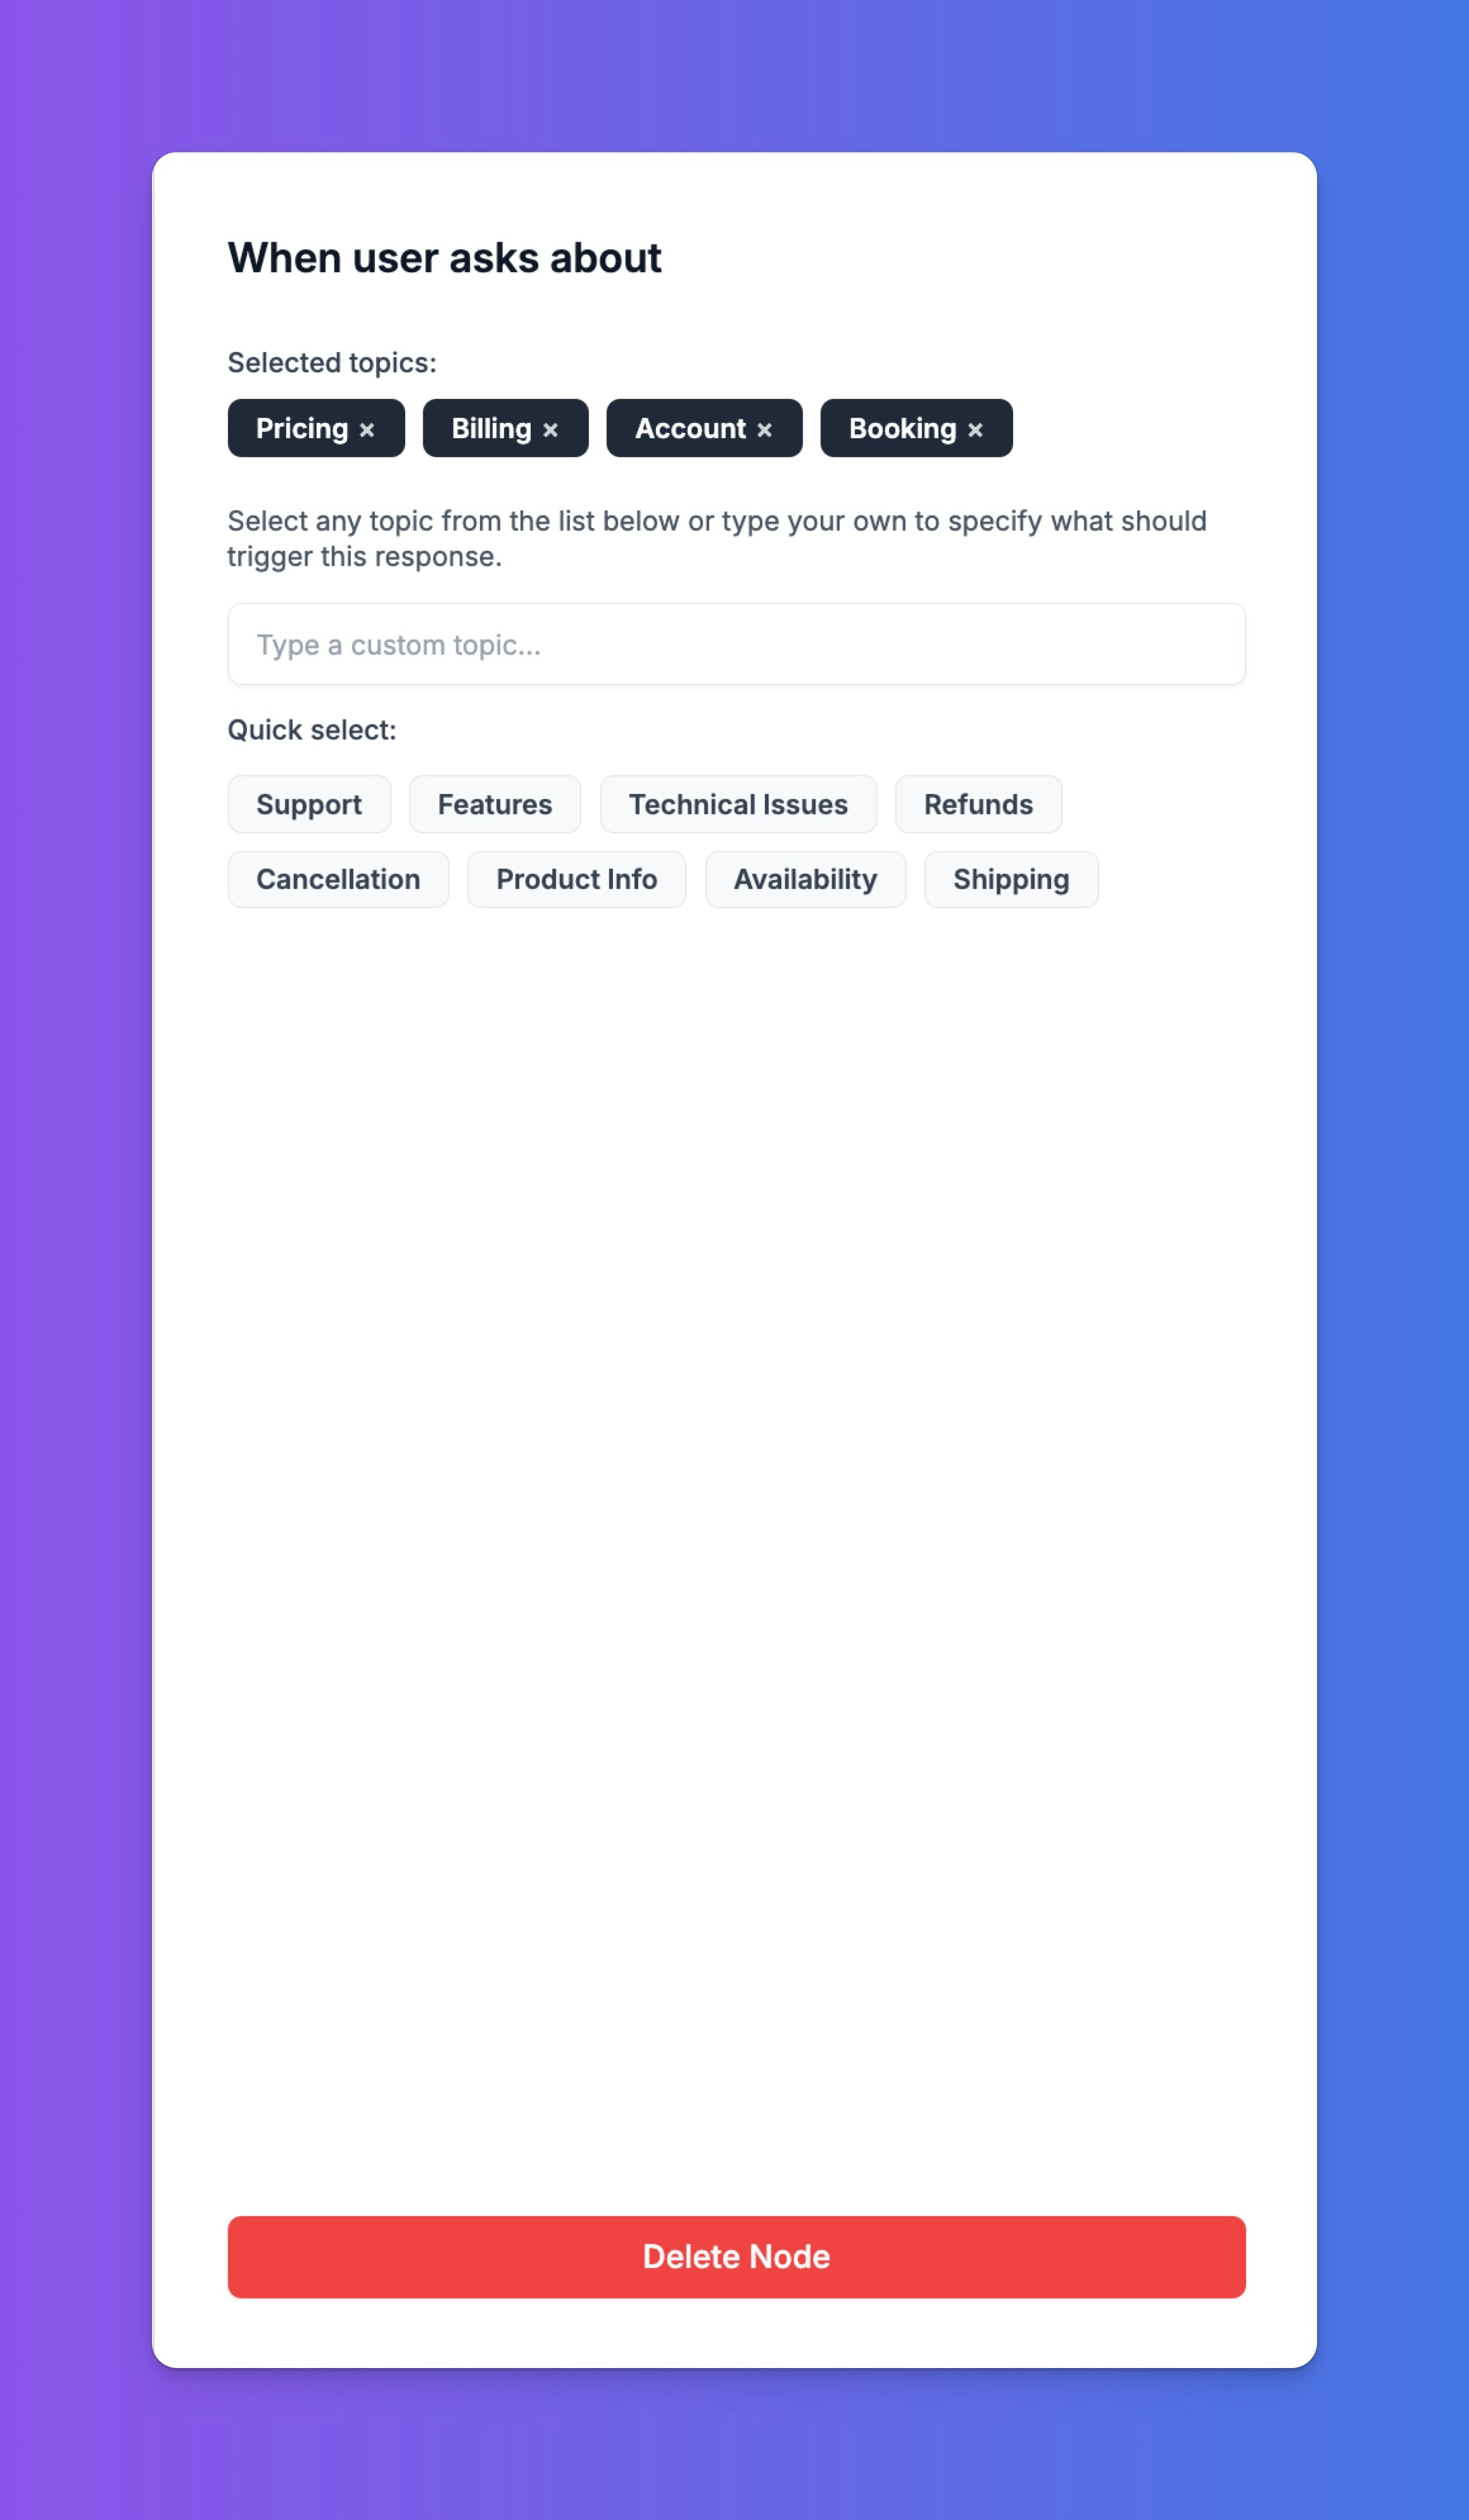
Logic nodes are the decision-makers that direct the flow of the conversation. They don’t speak to the user directly; they listen and route the user to the correct specialist.# Trigger: This is the universal entry point. Every conversation, whether it’s an incoming phone call, a website chat, or an API-initiated call, begins here. It is the fixed starting point of every workflow.# Start with / # End with: These are structural best practices. The# Start withnode typically handles the initial greeting by passing control to aGreeting Agent. The# End withnode ensures a consistent and polite conclusion by passing control to anEnding Agent.# When user asks about: This is the most important logic node in your arsenal. It acts as the central router for the conversation. Powered by a sophisticated Intent Classifier, this node analyzes the user’s speech or text to understand their goal. You can define various conversational paths based on topics. These topics are automatically suggested from your Knowledge Base, but you can also add custom keywords or phrases. When the user’s query matches a topic (e.g., “Pricing” or “Billing”), the workflow directs the conversation to the specialist sub-agent connected to that path.
Agent Nodes: The “Doers” of the Workflow
Agent nodes, or sub-agents, are the workers that perform the actual conversational tasks. You can add new logic and agent nodes at any point by clicking the+ icon on the canvas, allowing for complex, branching conversations.
Deep Dive: Configuring a Sub-Agent
The true power of the workflow is realized when you configure each sub-agent. Clicking on any agent node opens its detailed configuration panel, allowing you to give it a unique personality, purpose, and set of capabilities.
Core Configuration
- Title: A clear name for the node (e.g., “Lead Qualification Agent”).
- Prompt: A hyper-specific prompt that applies only to this sub-agent. This overrides the main agent’s prompt and is the key to specialization. For a lead qualification agent, the prompt might be: “Your only job is to collect the user’s full name and email address. Be polite but persistent. Do not answer any other questions.”
Preferences Tab
- Enable Knowledge Base: This powerful toggle dictates whether the sub-agent can access the workspace’s central knowledge.
- Enabled: The sub-agent can freely use the Knowledge Base to answer user questions. This is ideal for a
Customer Support Agent. - Disabled: The sub-agent is “on-rails” and will strictly adhere to its prompt. It will not attempt to answer off-topic questions. This is perfect for task-oriented agents, like a
Lead Qualification Agent, ensuring it doesn’t get sidetracked.
- Enabled: The sub-agent can freely use the Knowledge Base to answer user questions. This is ideal for a
- Goals of the agent: This feature turns your agent into a data-gathering tool. Goals are specific pieces of information the sub-agent is tasked with collecting.
-
You can Add Goal to define data points like
firstName,lastName,email, orissue_description. -
Marking a goal as
requiredmakes the sub-agent persistent. It will not consider its task complete and will not move on until it has successfully collected that piece of information from the user.
-
You can Add Goal to define data points like
Functions Tab (Coming soon)
- Add Function: This advanced feature allows you to give your agent superpowers by connecting it to external APIs. For example, you could add a function to:
- Check an order status in your e-commerce system.
- Create a support ticket in Zendesk or Jira.
- Book an appointment in a calendar.