A Deep Dive into the Agent Playground
The Agent Playground is the central hub where you bring your AI agent to life. It’s a powerful, interactive studio designed for configuring every aspect of your agent’s personality, knowledge, voice, and behavior. From here, you can fine-tune your agent and test its responses in real-time before deploying it to your website widget, phone system, or other platforms. This guide provides a comprehensive walkthrough of every setting available in the playground.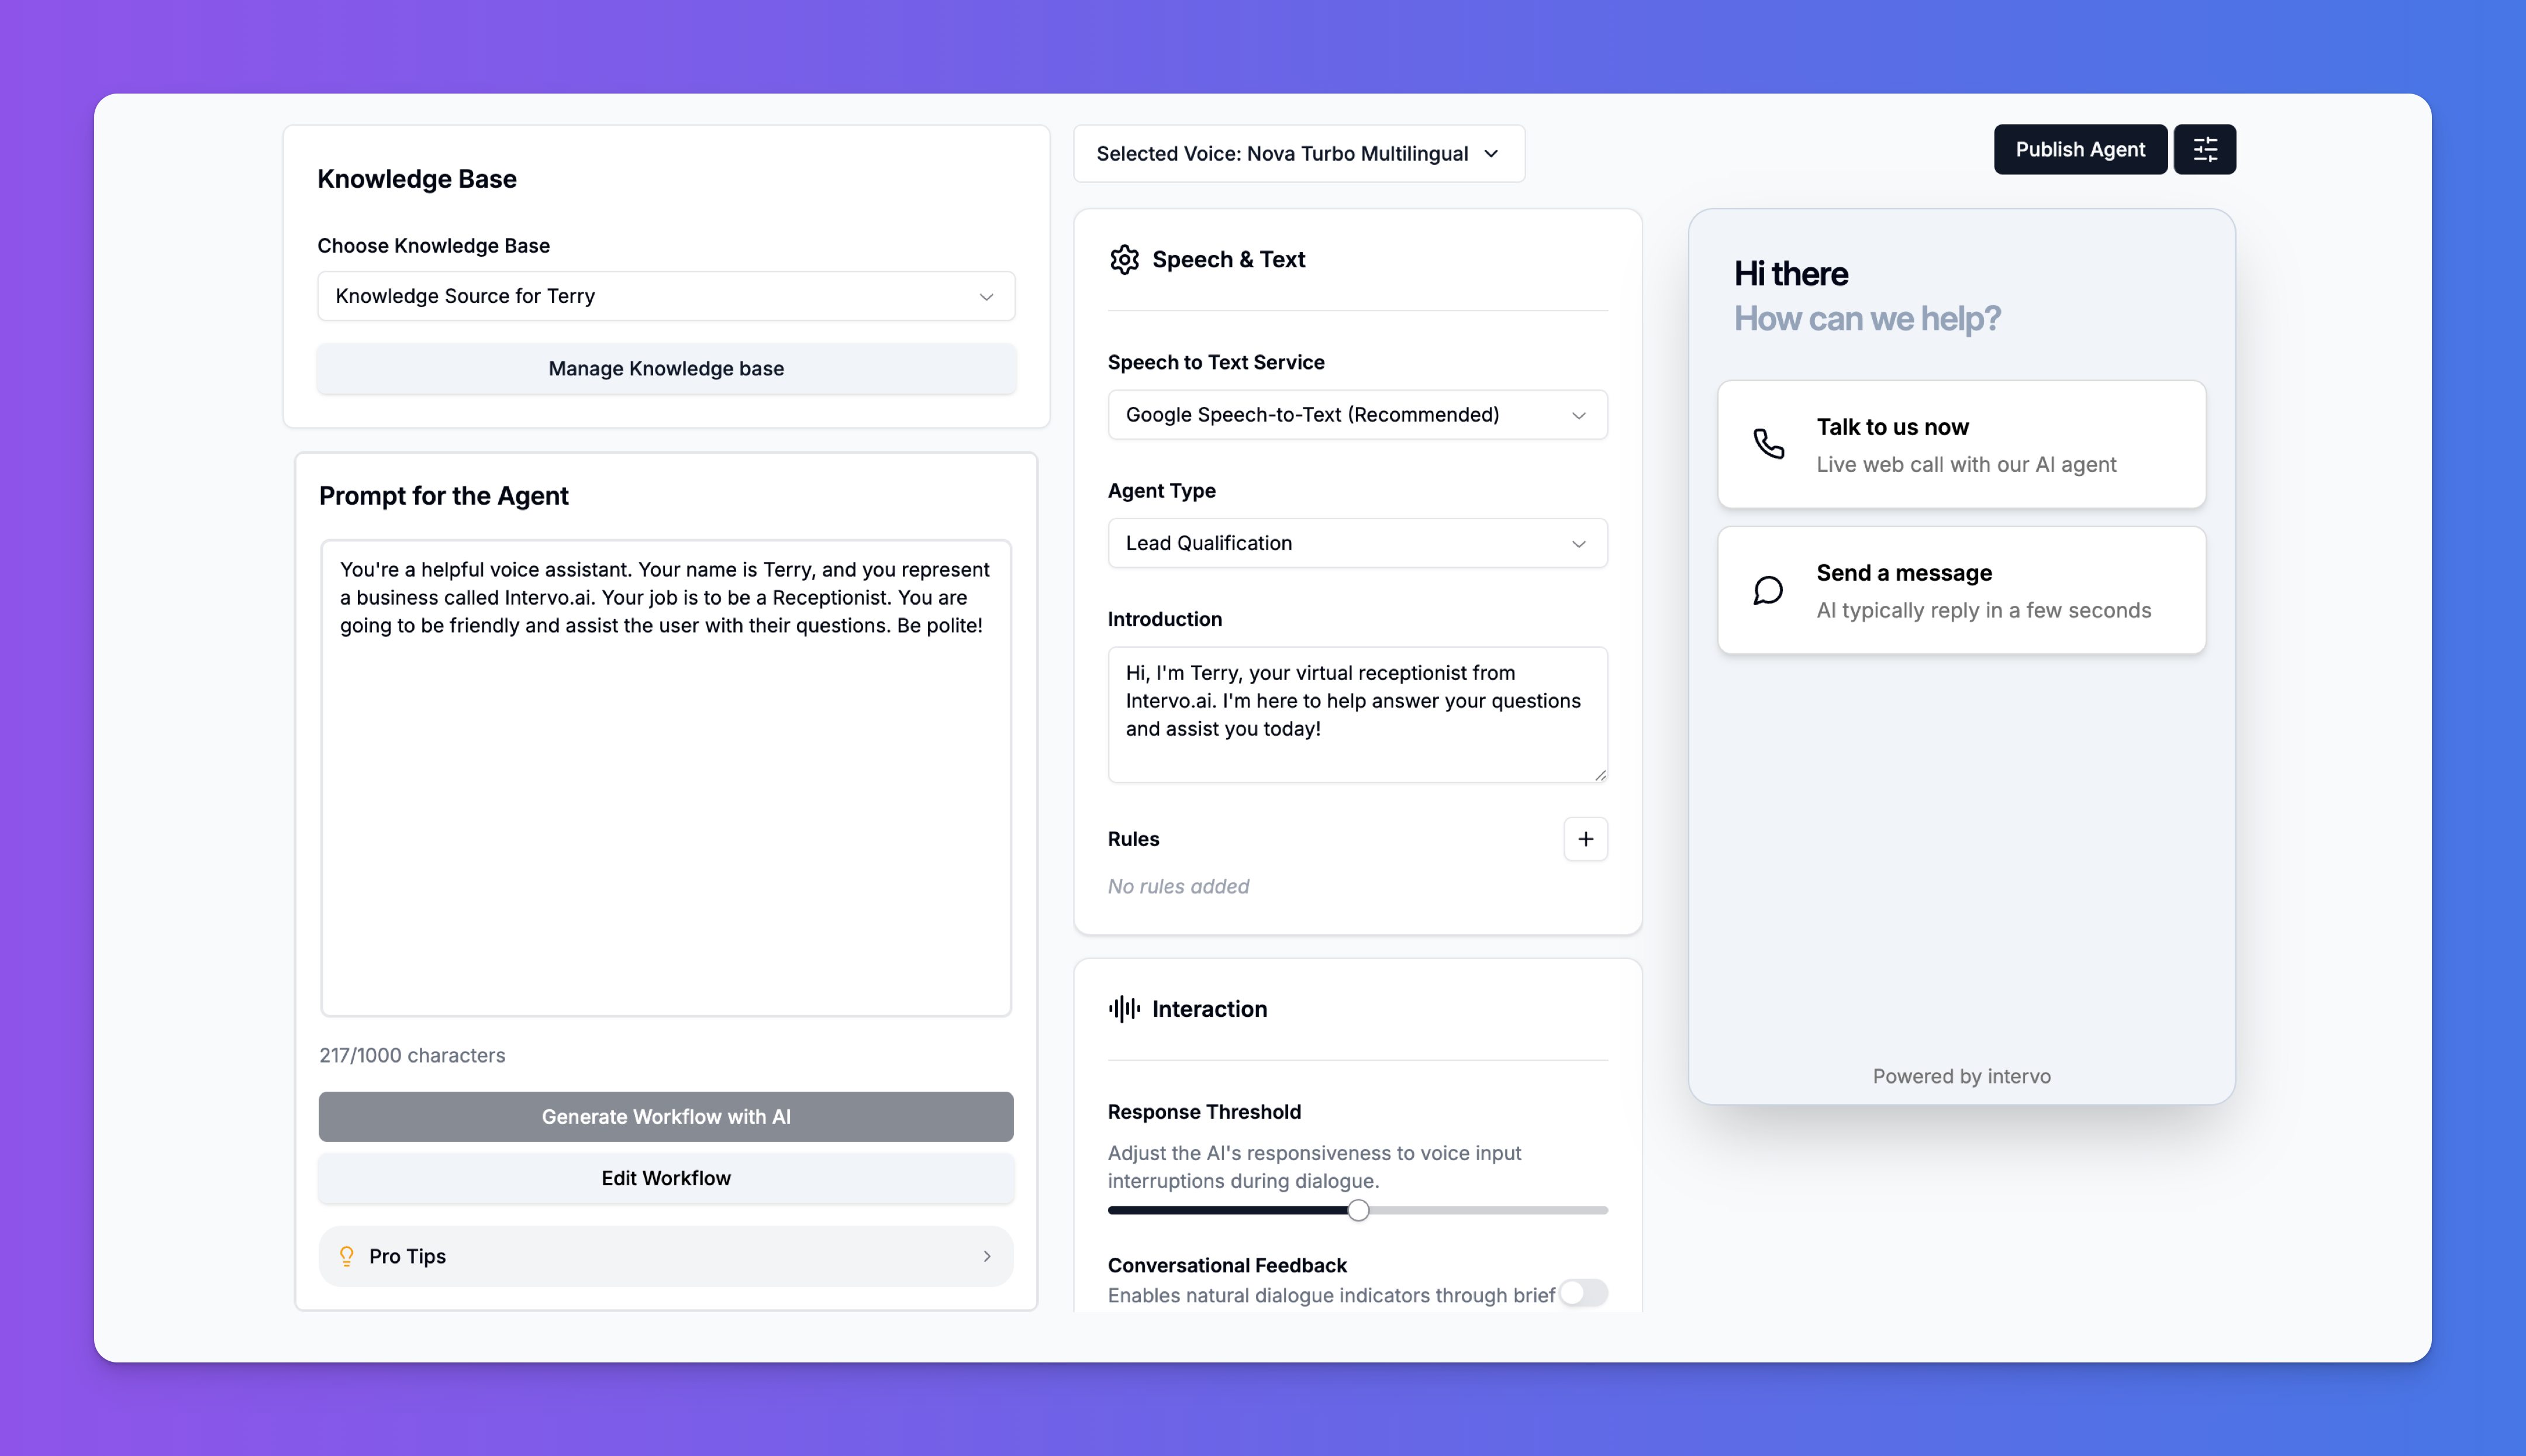
Understanding the Layout
The Agent Playground is organized into three main panels for an efficient workflow:- The Agent’s Brain (Left Panel): This area contains the core intelligence of your agent—its knowledge and primary instructions.
- The Agent’s Behavior (Center Panel): This is where you configure the agent’s voice, interaction style, and technical parameters.
- Live Preview (Right Panel): This interactive panel allows you to chat or speak with your agent to test its responses and behavior instantly.
1. The Agent’s Brain: Knowledge and Prompt
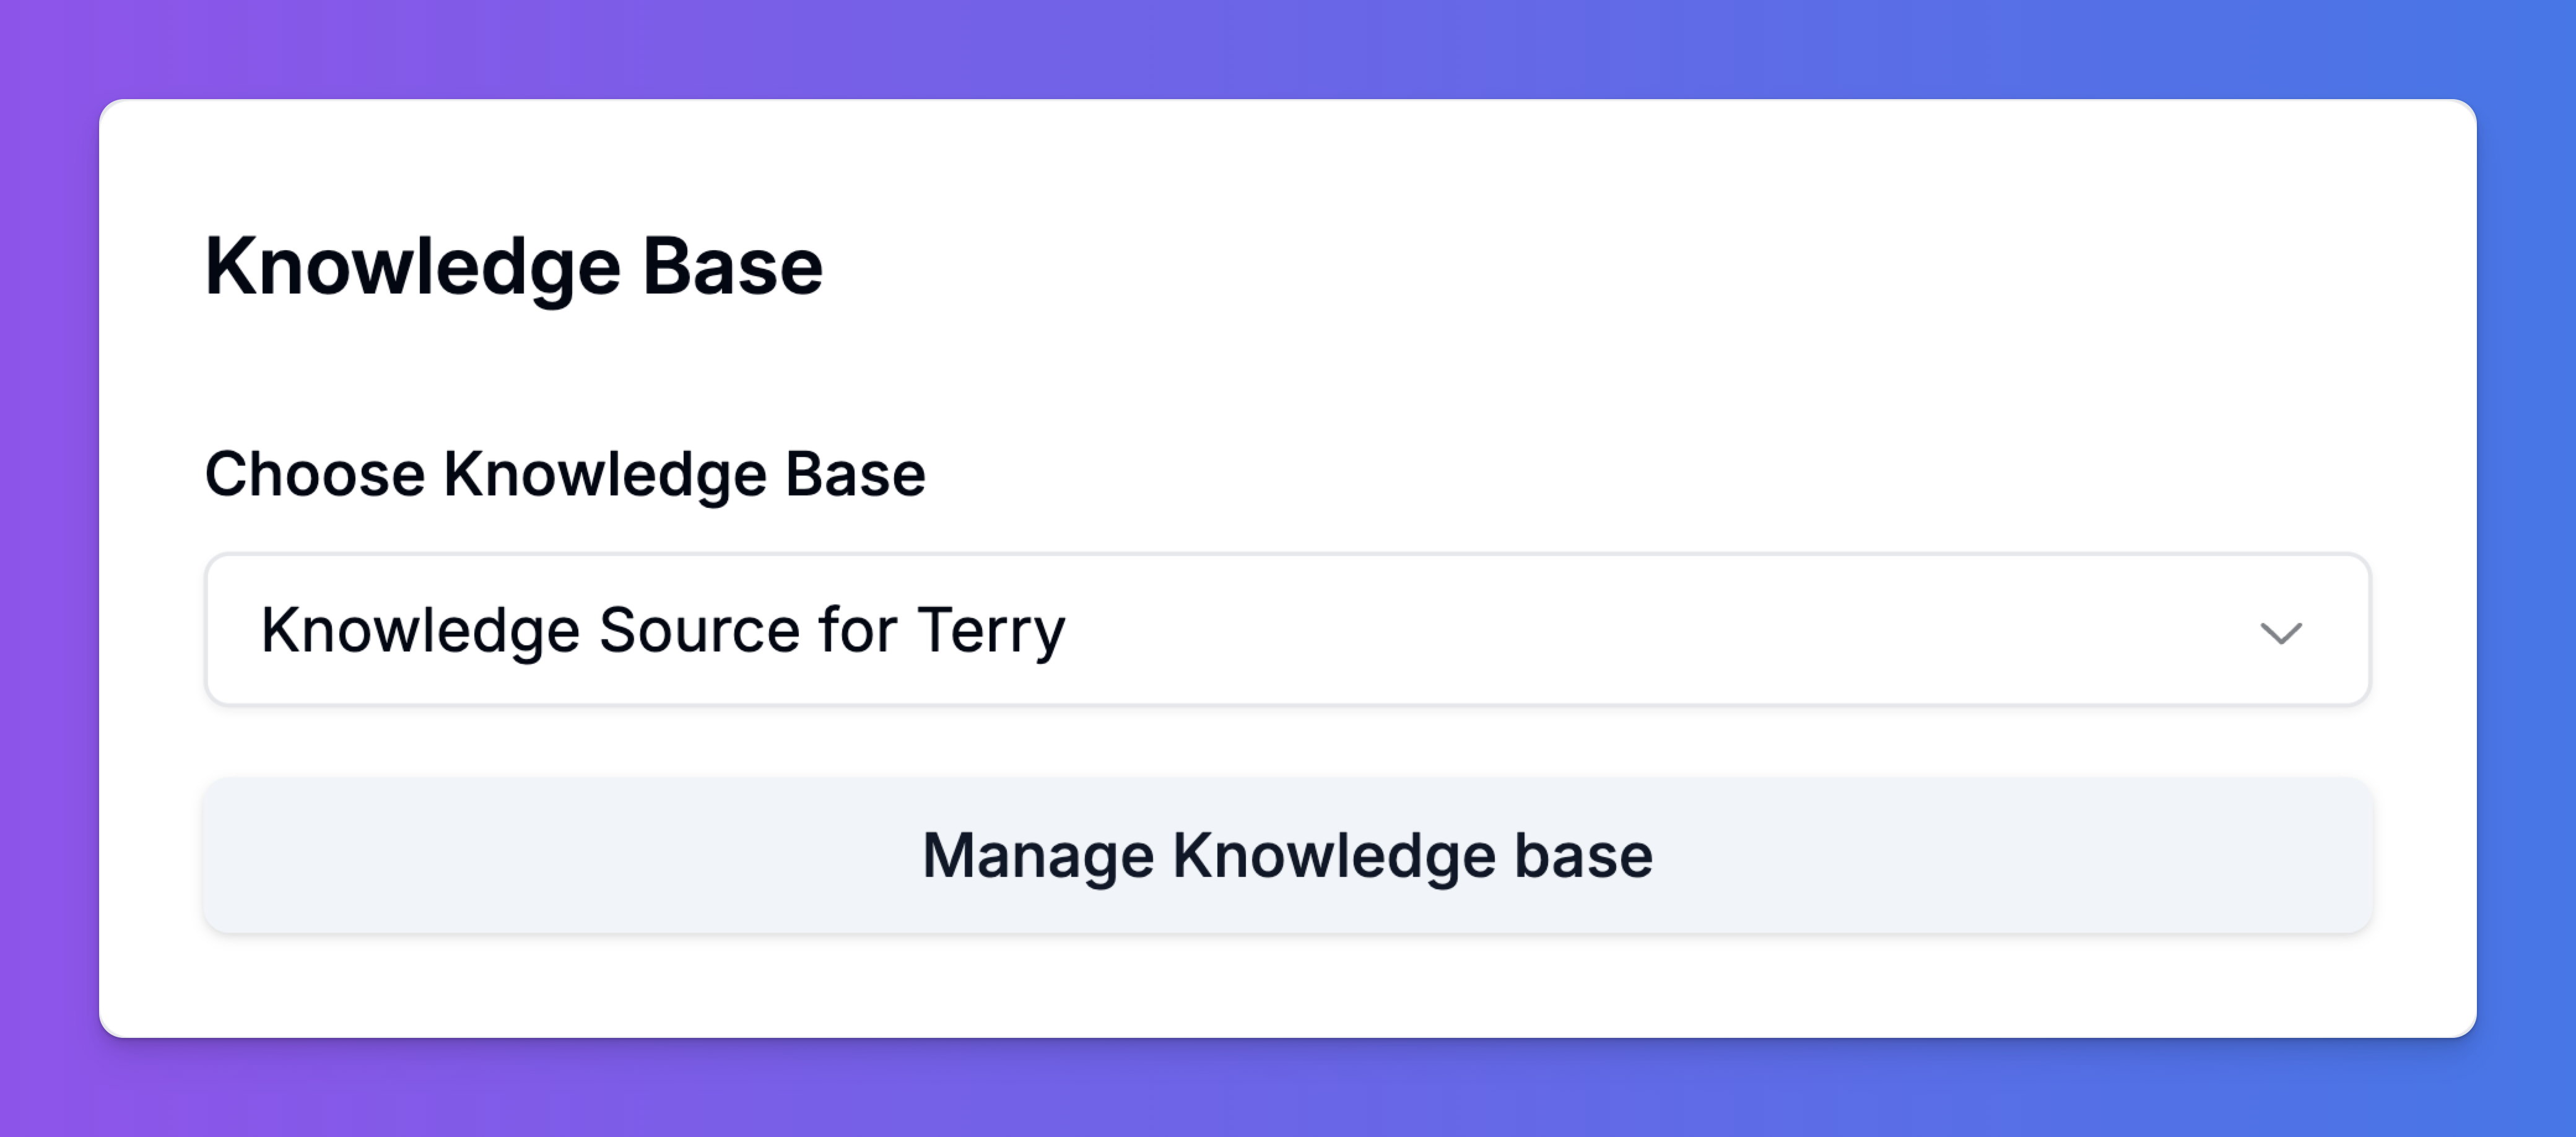
This left-most panel defines what your agent knows and who it is.Knowledge Base
This section connects your agent to its source of truth.- Choose Knowledge Base: Use the dropdown to select from your pre-existing Knowledge Bases. You can create different knowledge sources for different roles (e.g., “Sales KB,” “Support KB”) and assign them here.
- Manage Knowledge base: Clicking this button takes you to the dedicated Knowledge Base editor, where you can add and manage content from files, websites, text snippets, and FAQs.
For a detailed guide on creating a knowledge source, please see our article, “Mastering Your Agent’s Knowledge Base.”
Prompt for the Agent & Workflow
The prompt is the most critical instruction you will give your agent. It defines its core personality, purpose, and constraints. A well-written prompt ensures the agent is helpful, on-brand, and understands its primary role.- Prompt Field: Write the core instructions here. Include details like the agent’s name, the business it represents, its main objective (e.g., “Your job is to be a Receptionist and assist users…”), and its tone (“Be friendly and polite”). This helps us create the Workflow for the agent.
- Edit Workflow: This is a shortcut that takes you to the workflow for the agent and how the agent makes decisions based on intent.

2. The Agent’s Behavior: Voice, Speech & Interactions
The center panel is where you fine-tune the technical and behavioral aspects of your agent, especially for voice interactions.Voice Selection
As a voice-first platform, Intervo.ai gives you granular control over how your agent sounds.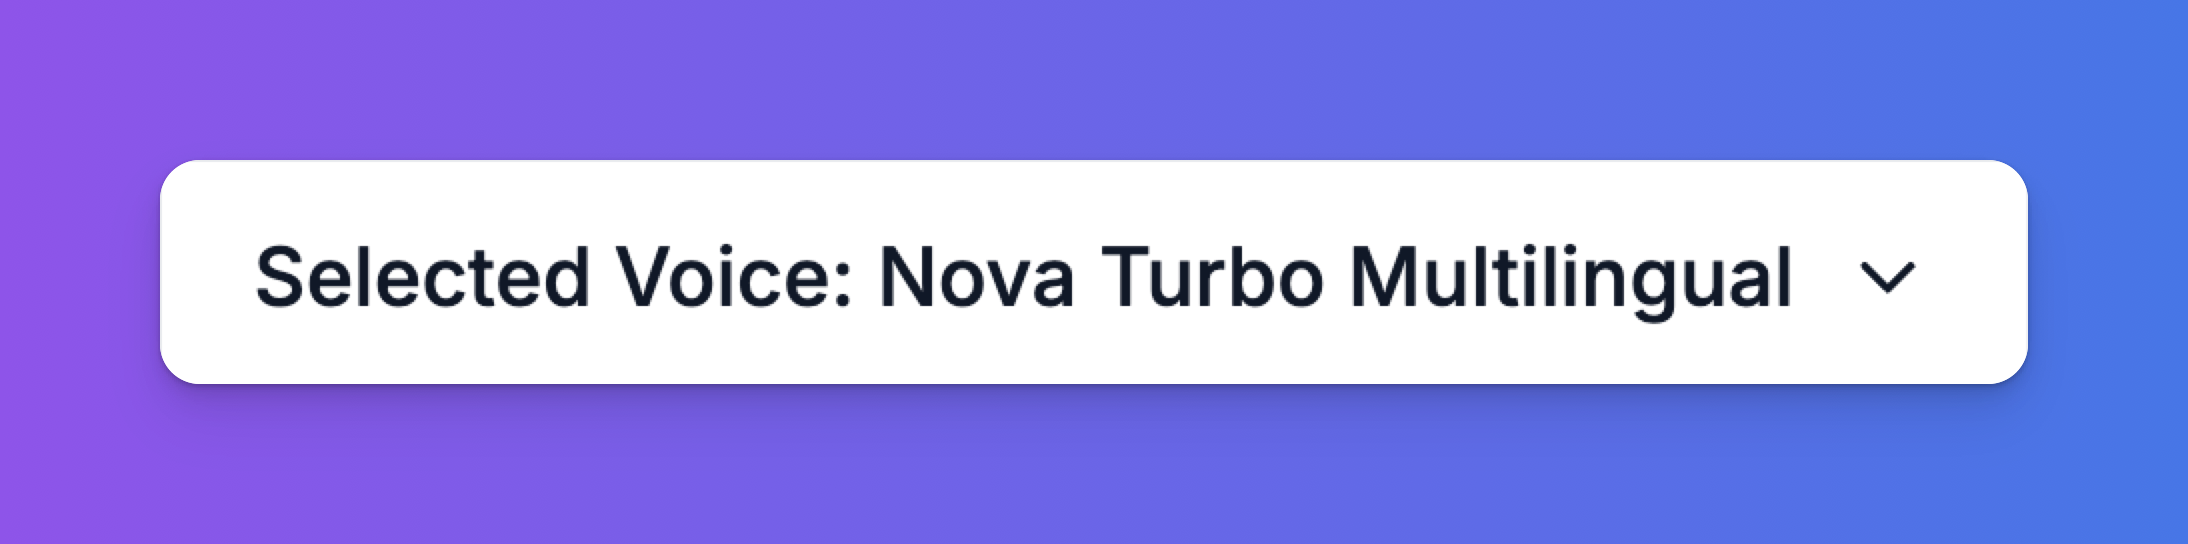
- Main Voice Dropdown: For a quick selection, use this dropdown at the top of the panel to choose a voice, such as “Nova Turbo Multilingual.”
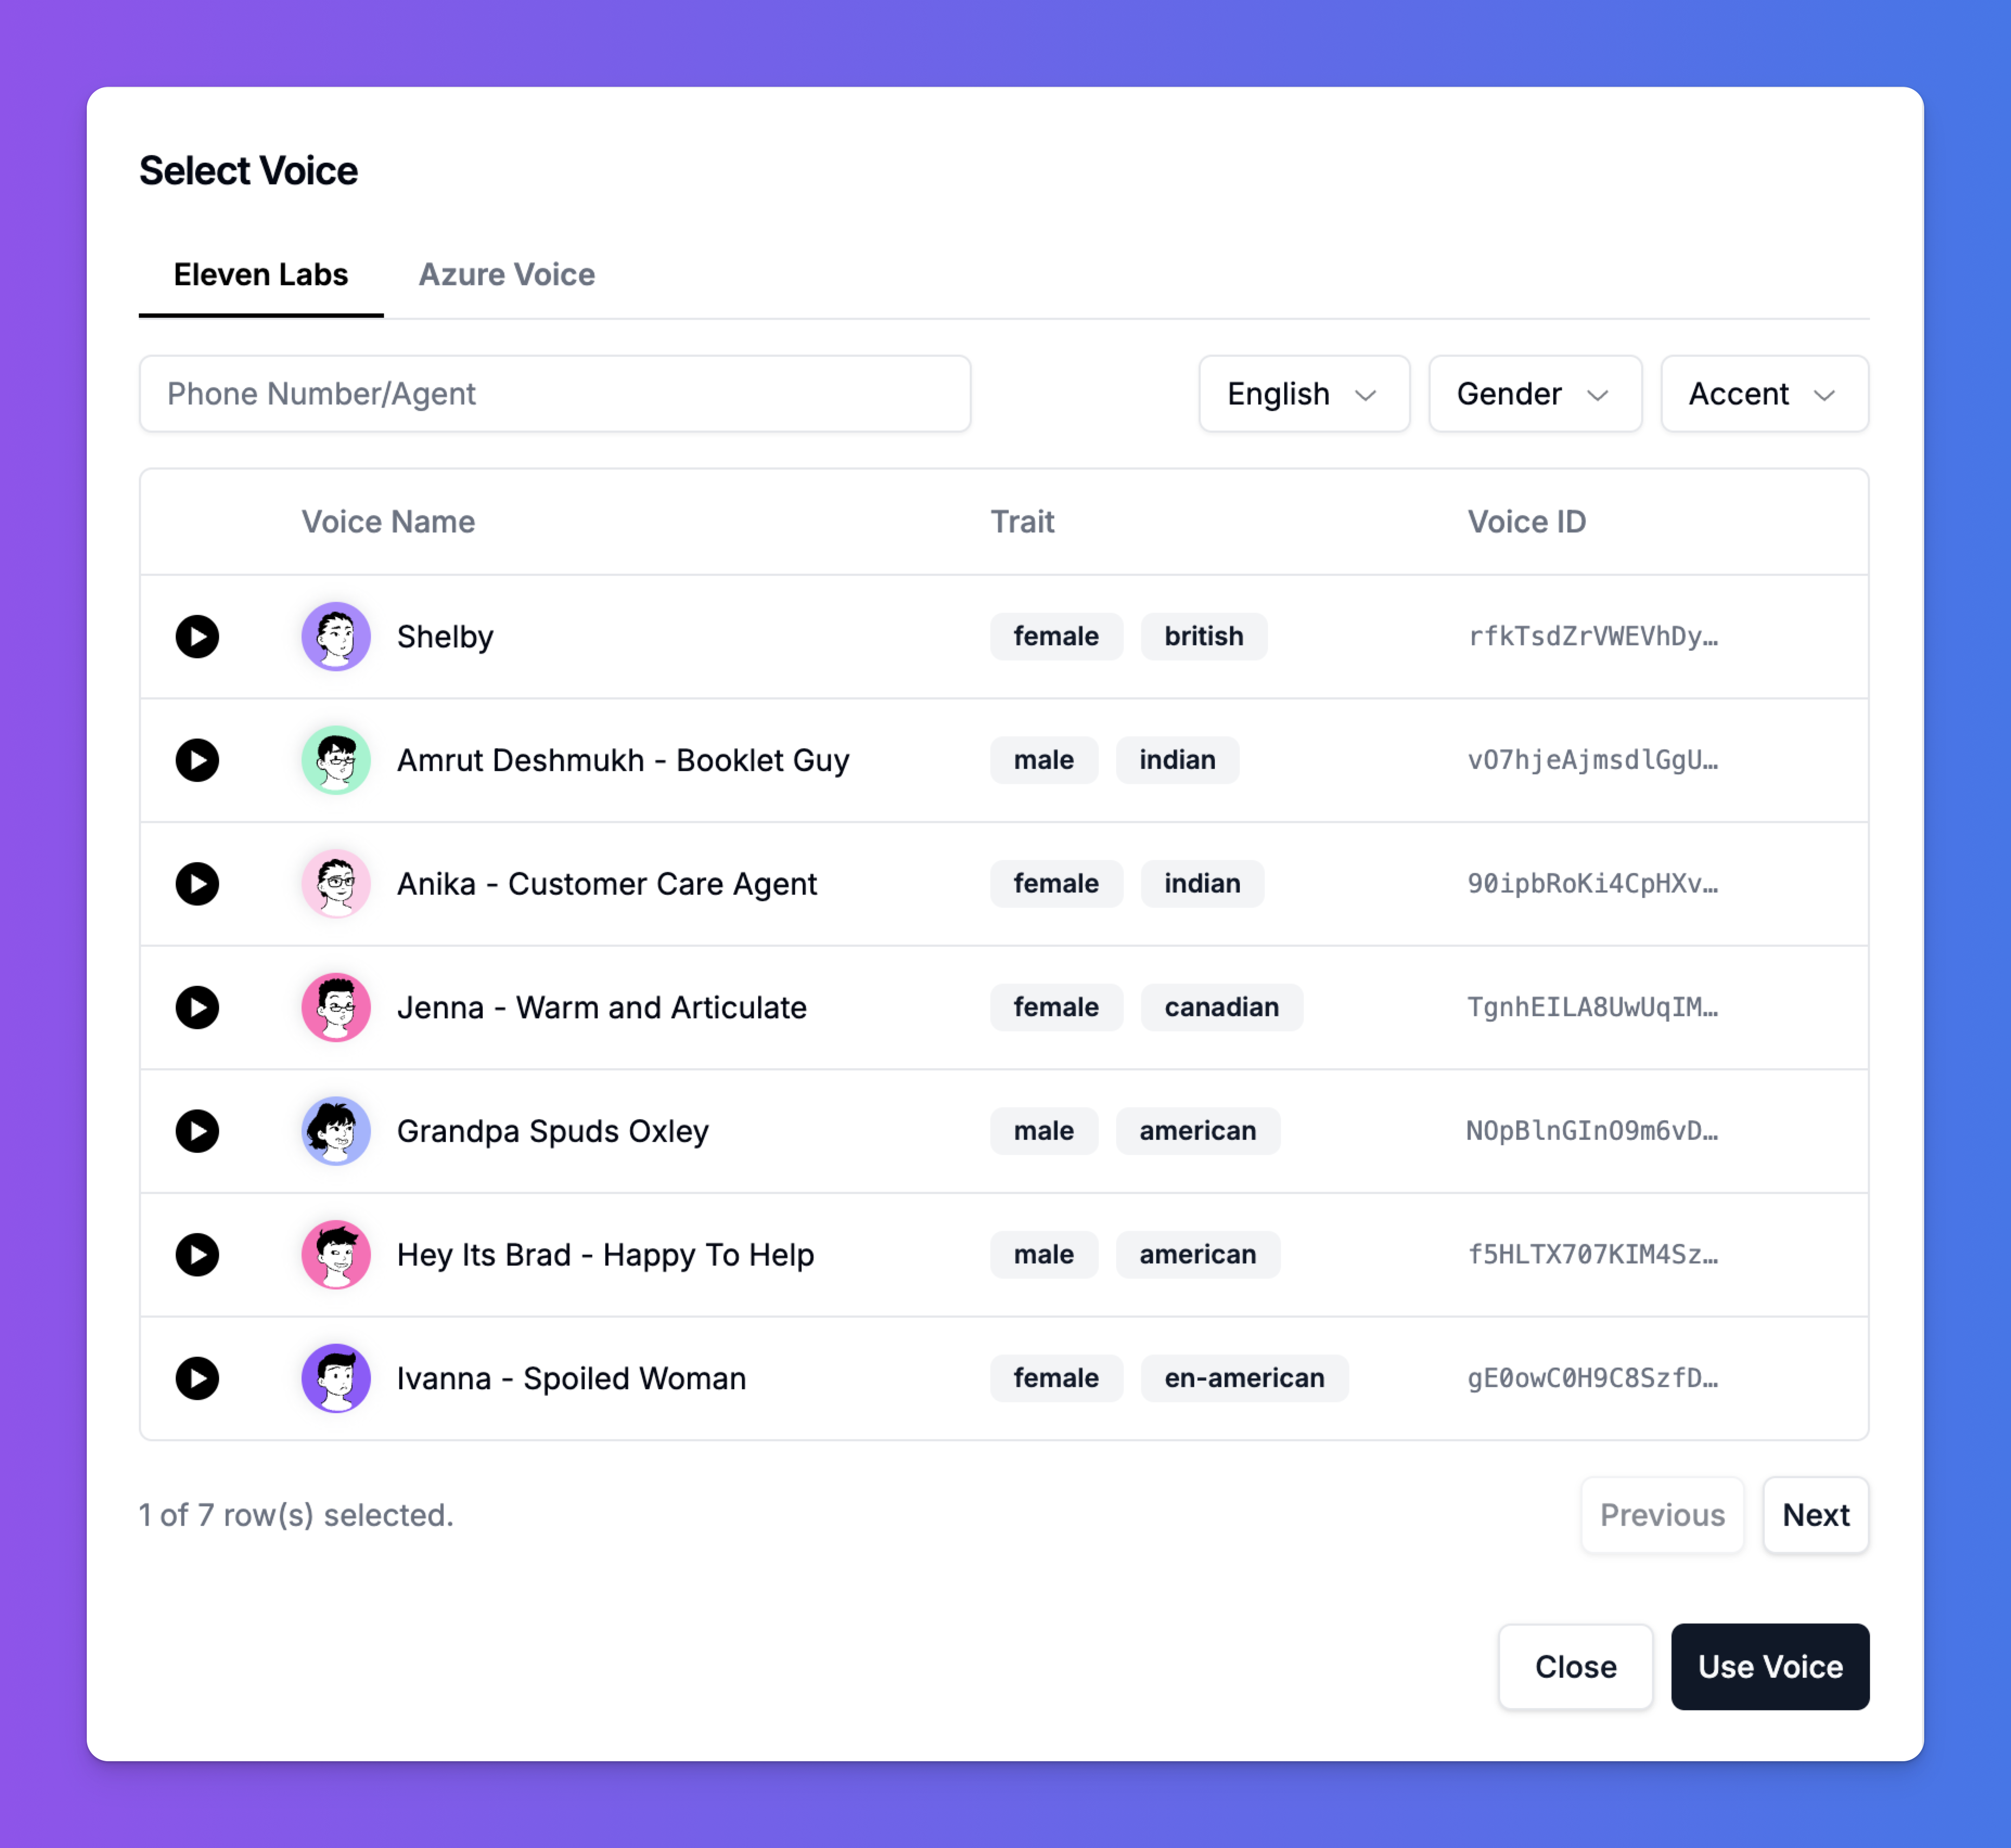
- Detailed Voice Selection: Clicking the dropdown opens a detailed modal where you can browse and filter voices from our partners, including Eleven Labs and Azure Voice. You can filter by:
- Language
- Gender
- Accent (e.g., British, Indian, American)
- Trait (e.g., female, canadian, male)
- You can preview each voice before selecting it by clicking the play icon.
Speech & Text Configuration
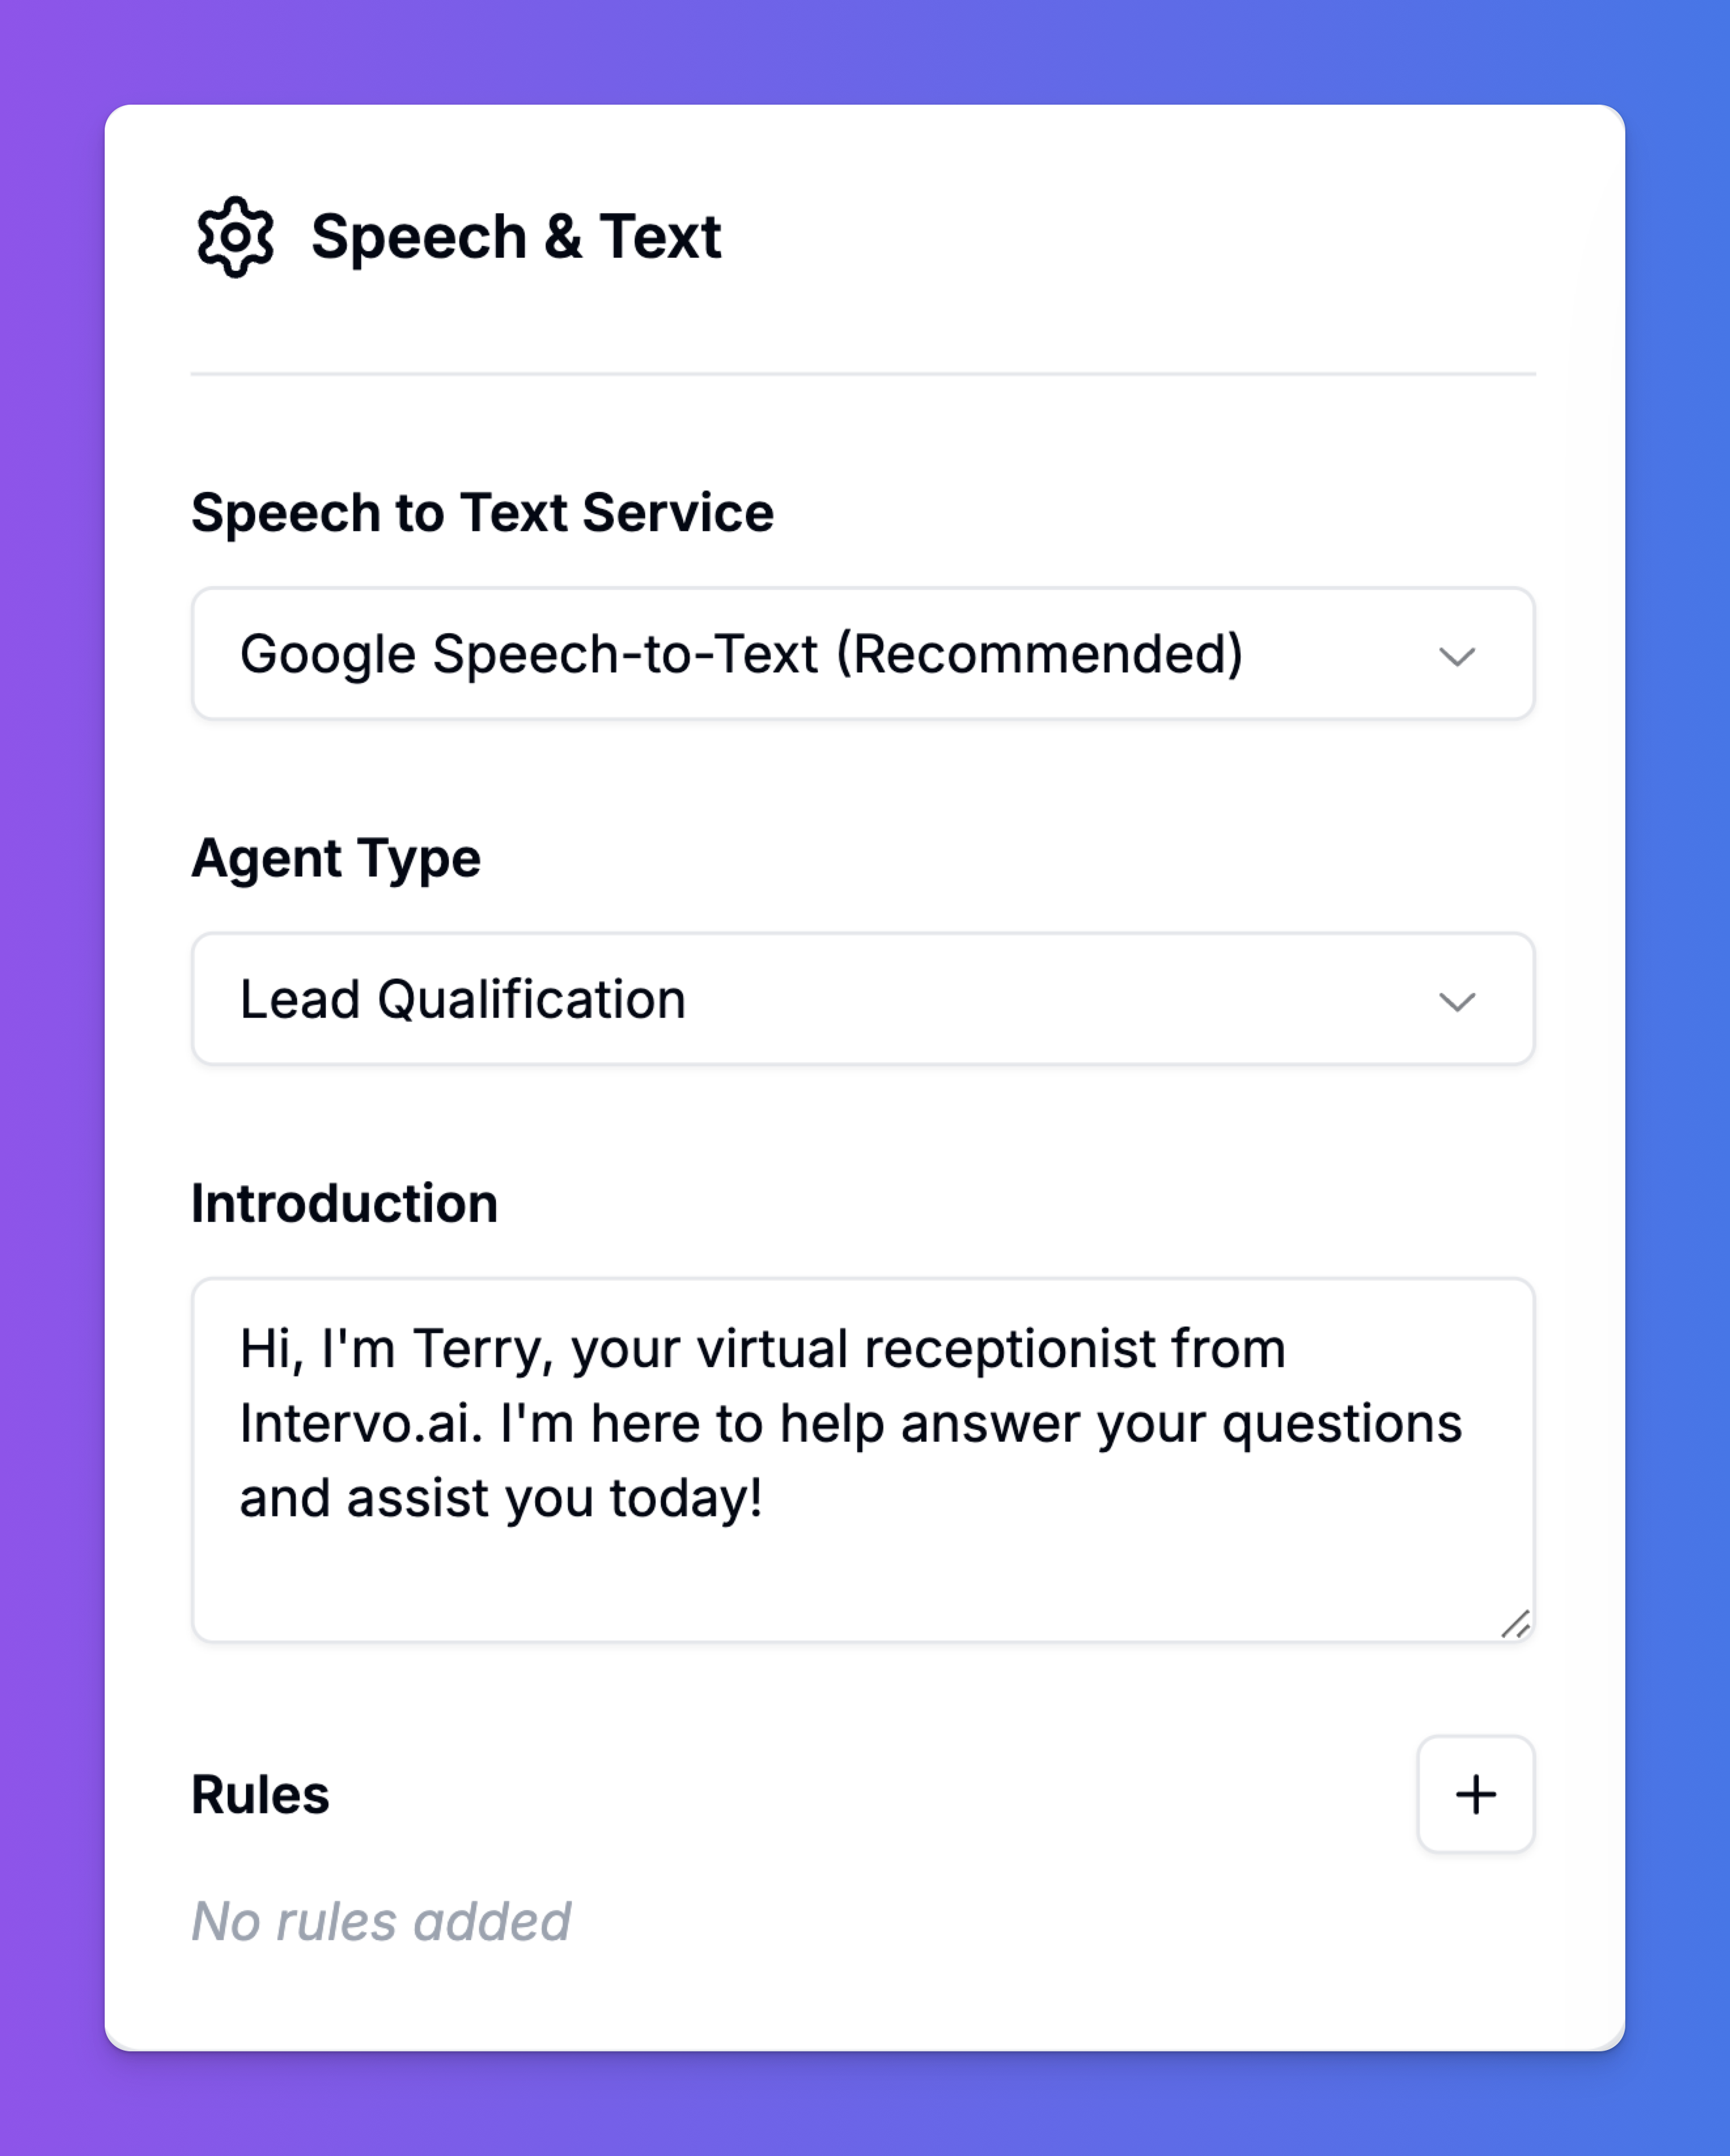
This section controls the technical aspects of speech processing.- Speech to Text Service: Choose the engine that will transcribe the user’s speech into text. We recommend Google Speech-to-Text for its high accuracy.
- Agent Type: This dropdown defines the agent’s general purpose (e.g., Receptionist, Lead Qualification). Selecting a type applies a set of pre-configured best-practice settings to the workflow.
- Introduction: This is the opening line your agent will use to start a conversation. Craft a welcoming and clear introduction so the user knows who they are talking to and what the agent can do.
- Rules: Add specific, unbreakable rules for your agent here. This is useful for compliance or for ensuring the agent never performs certain actions.
Interaction Settings
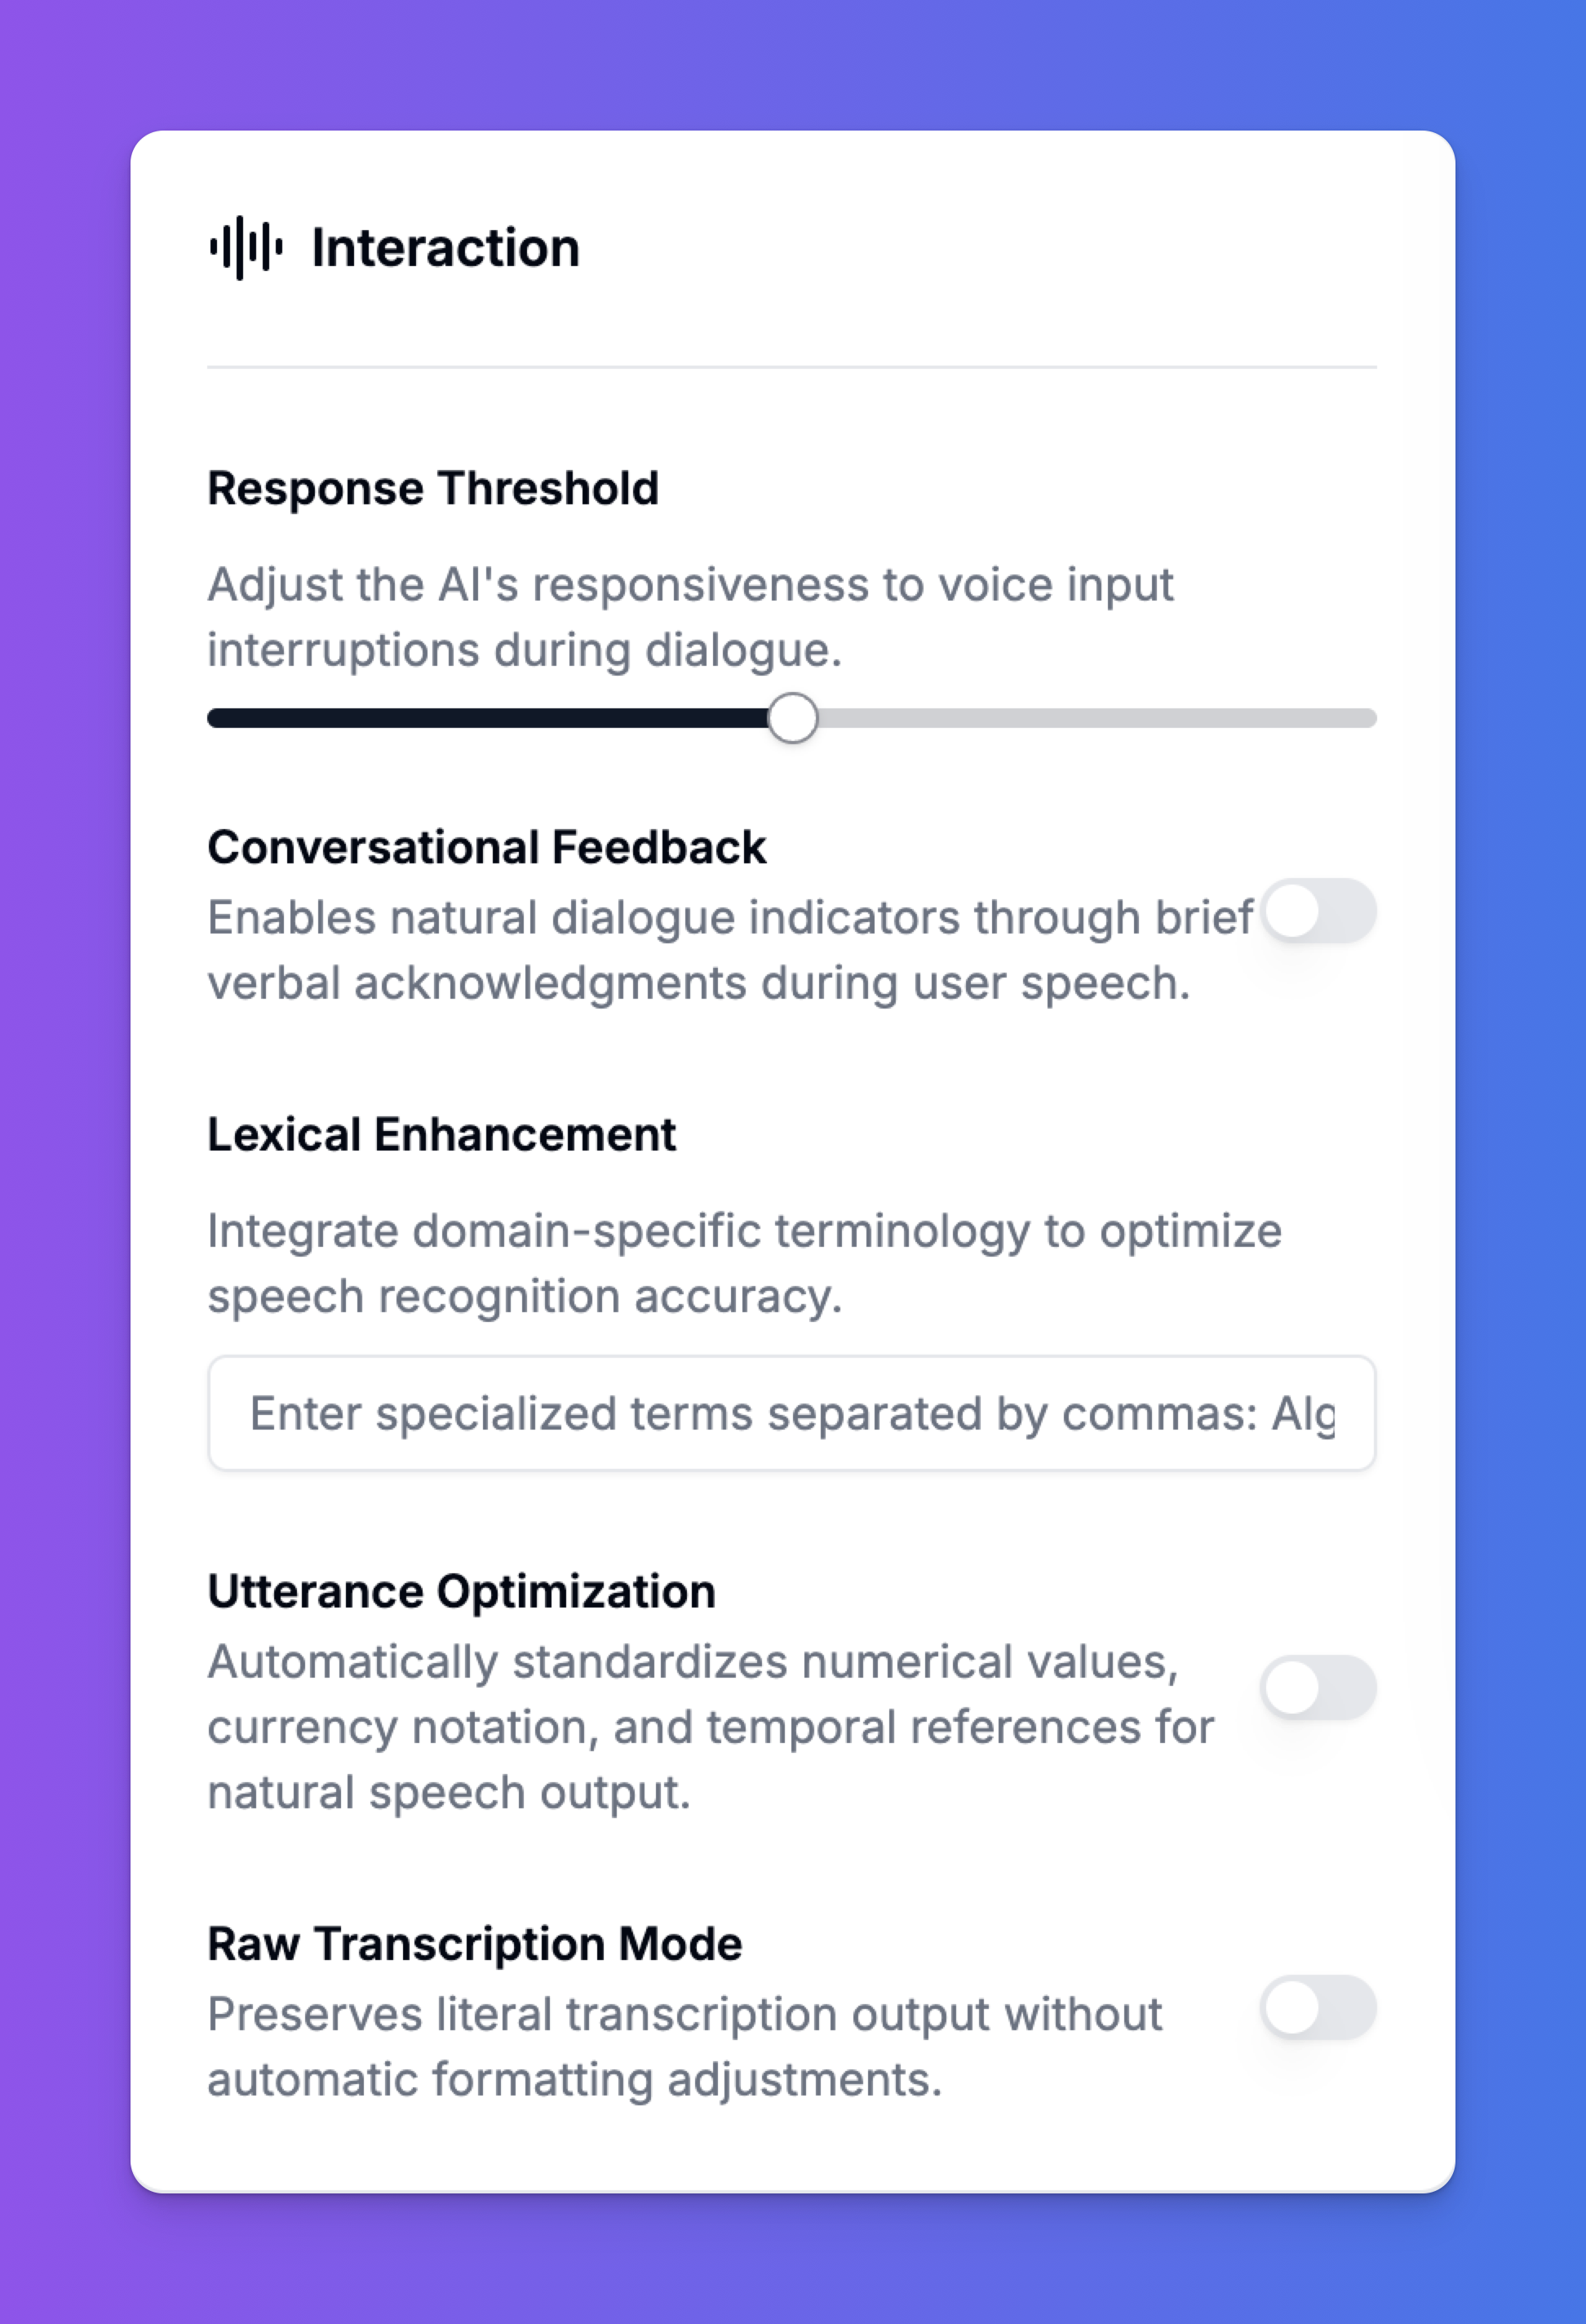
These advanced settings are crucial for creating a natural and fluid voice conversation.- Response Threshold: This slider adjusts how quickly the agent responds to interruptions. A lower threshold makes the agent more patient, while a higher threshold allows it to be interrupted more easily.
- Conversational Feedback: Enable this to allow the agent to use brief verbal acknowledgments (e.g., “uh-huh,” “I see”) while the user is speaking. This makes the conversation feel more natural and engaging.
- Lexical Enhancement: If your business uses specific jargon, acronyms, or technical terms, enter them here, separated by commas. This helps the Speech-to-Text engine recognize them accurately.
- Utterance Optimization: When enabled, this automatically standardizes how the agent speaks numerical values, currency, and dates for a more natural and consistent speech output.
- Raw Transcription Mode: This mode preserves the literal transcription output without any automatic formatting. It’s useful for specific use cases where you need the exact, unedited text.
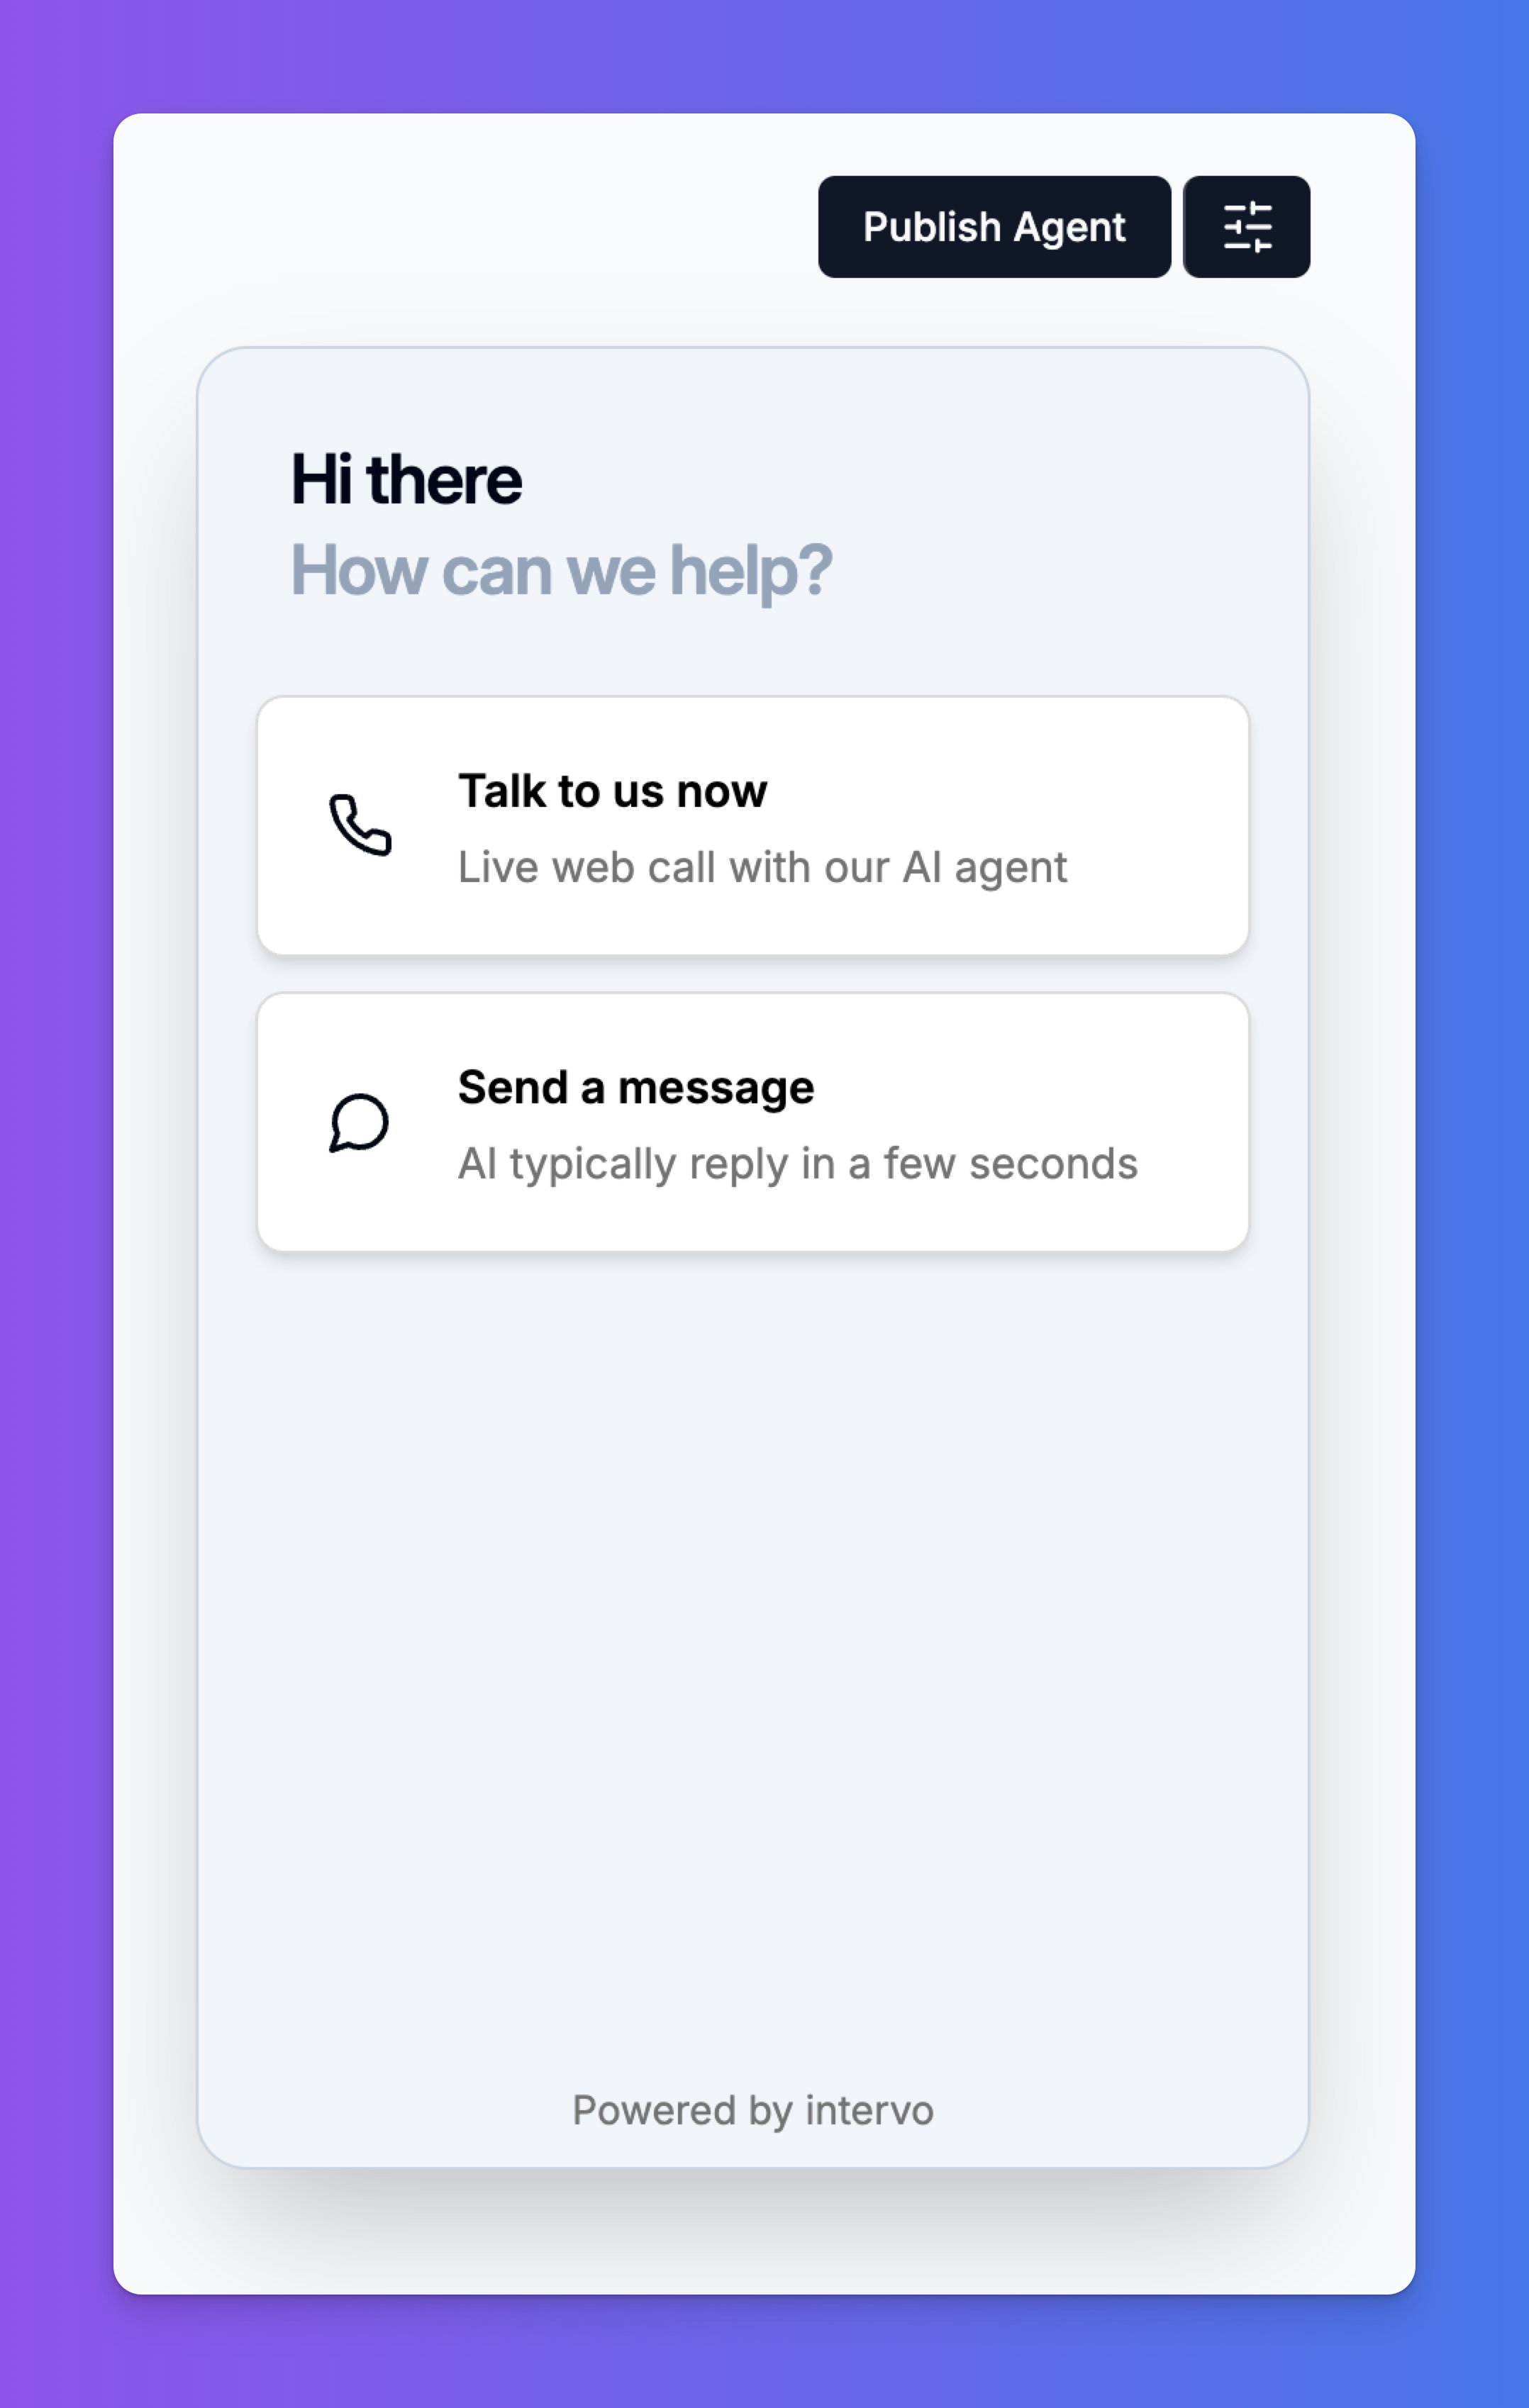
3. Live Preview and Publishing
The right-hand panel is your testing ground.- Preview Window: Interact with your agent using voice or text. Test its responses to various questions, check its tone, and see how it handles interruptions. The preview reflects your settings in real-time.
- Publish Agent: Once you are satisfied with your agent’s configuration and performance, click this button at the top right. This will save all your changes and deploy the updated version to its designated channels (widget, phone, etc.).