Integrating the Agent to Your Website with our Widget
The Intervo.ai Website Widget is the easiest way to bring your powerful voice and chat agent to your audience. With a simple copy-paste installation, you can provide instant, 24/7 conversational assistance directly on your website, engaging visitors and answering their questions in real-time. This guide will walk you through the entire process, from configuration to deployment.Prerequisite: Publish Your Agent
Before you can set up the widget, you must have a fully configured agent. Make sure you have:- Set up your agent’s Knowledge Base and Prompt.
- Configured its voice and behavior and the workflows.
- Clicked “Publish Agent” from the Agent Playground to make it live.
1. Installation: Embedding the Widget
The first step is to get the widget code onto your website.- Navigate to the Connect settings for your published agent.
- Select the Website Widget deployment option.
- You will be presented with two methods: Embed a chat Bubble and Embed the iframe directly (coming soon). Choose Embed a chat Bubble.
- Copy the provided
<script>snippet.
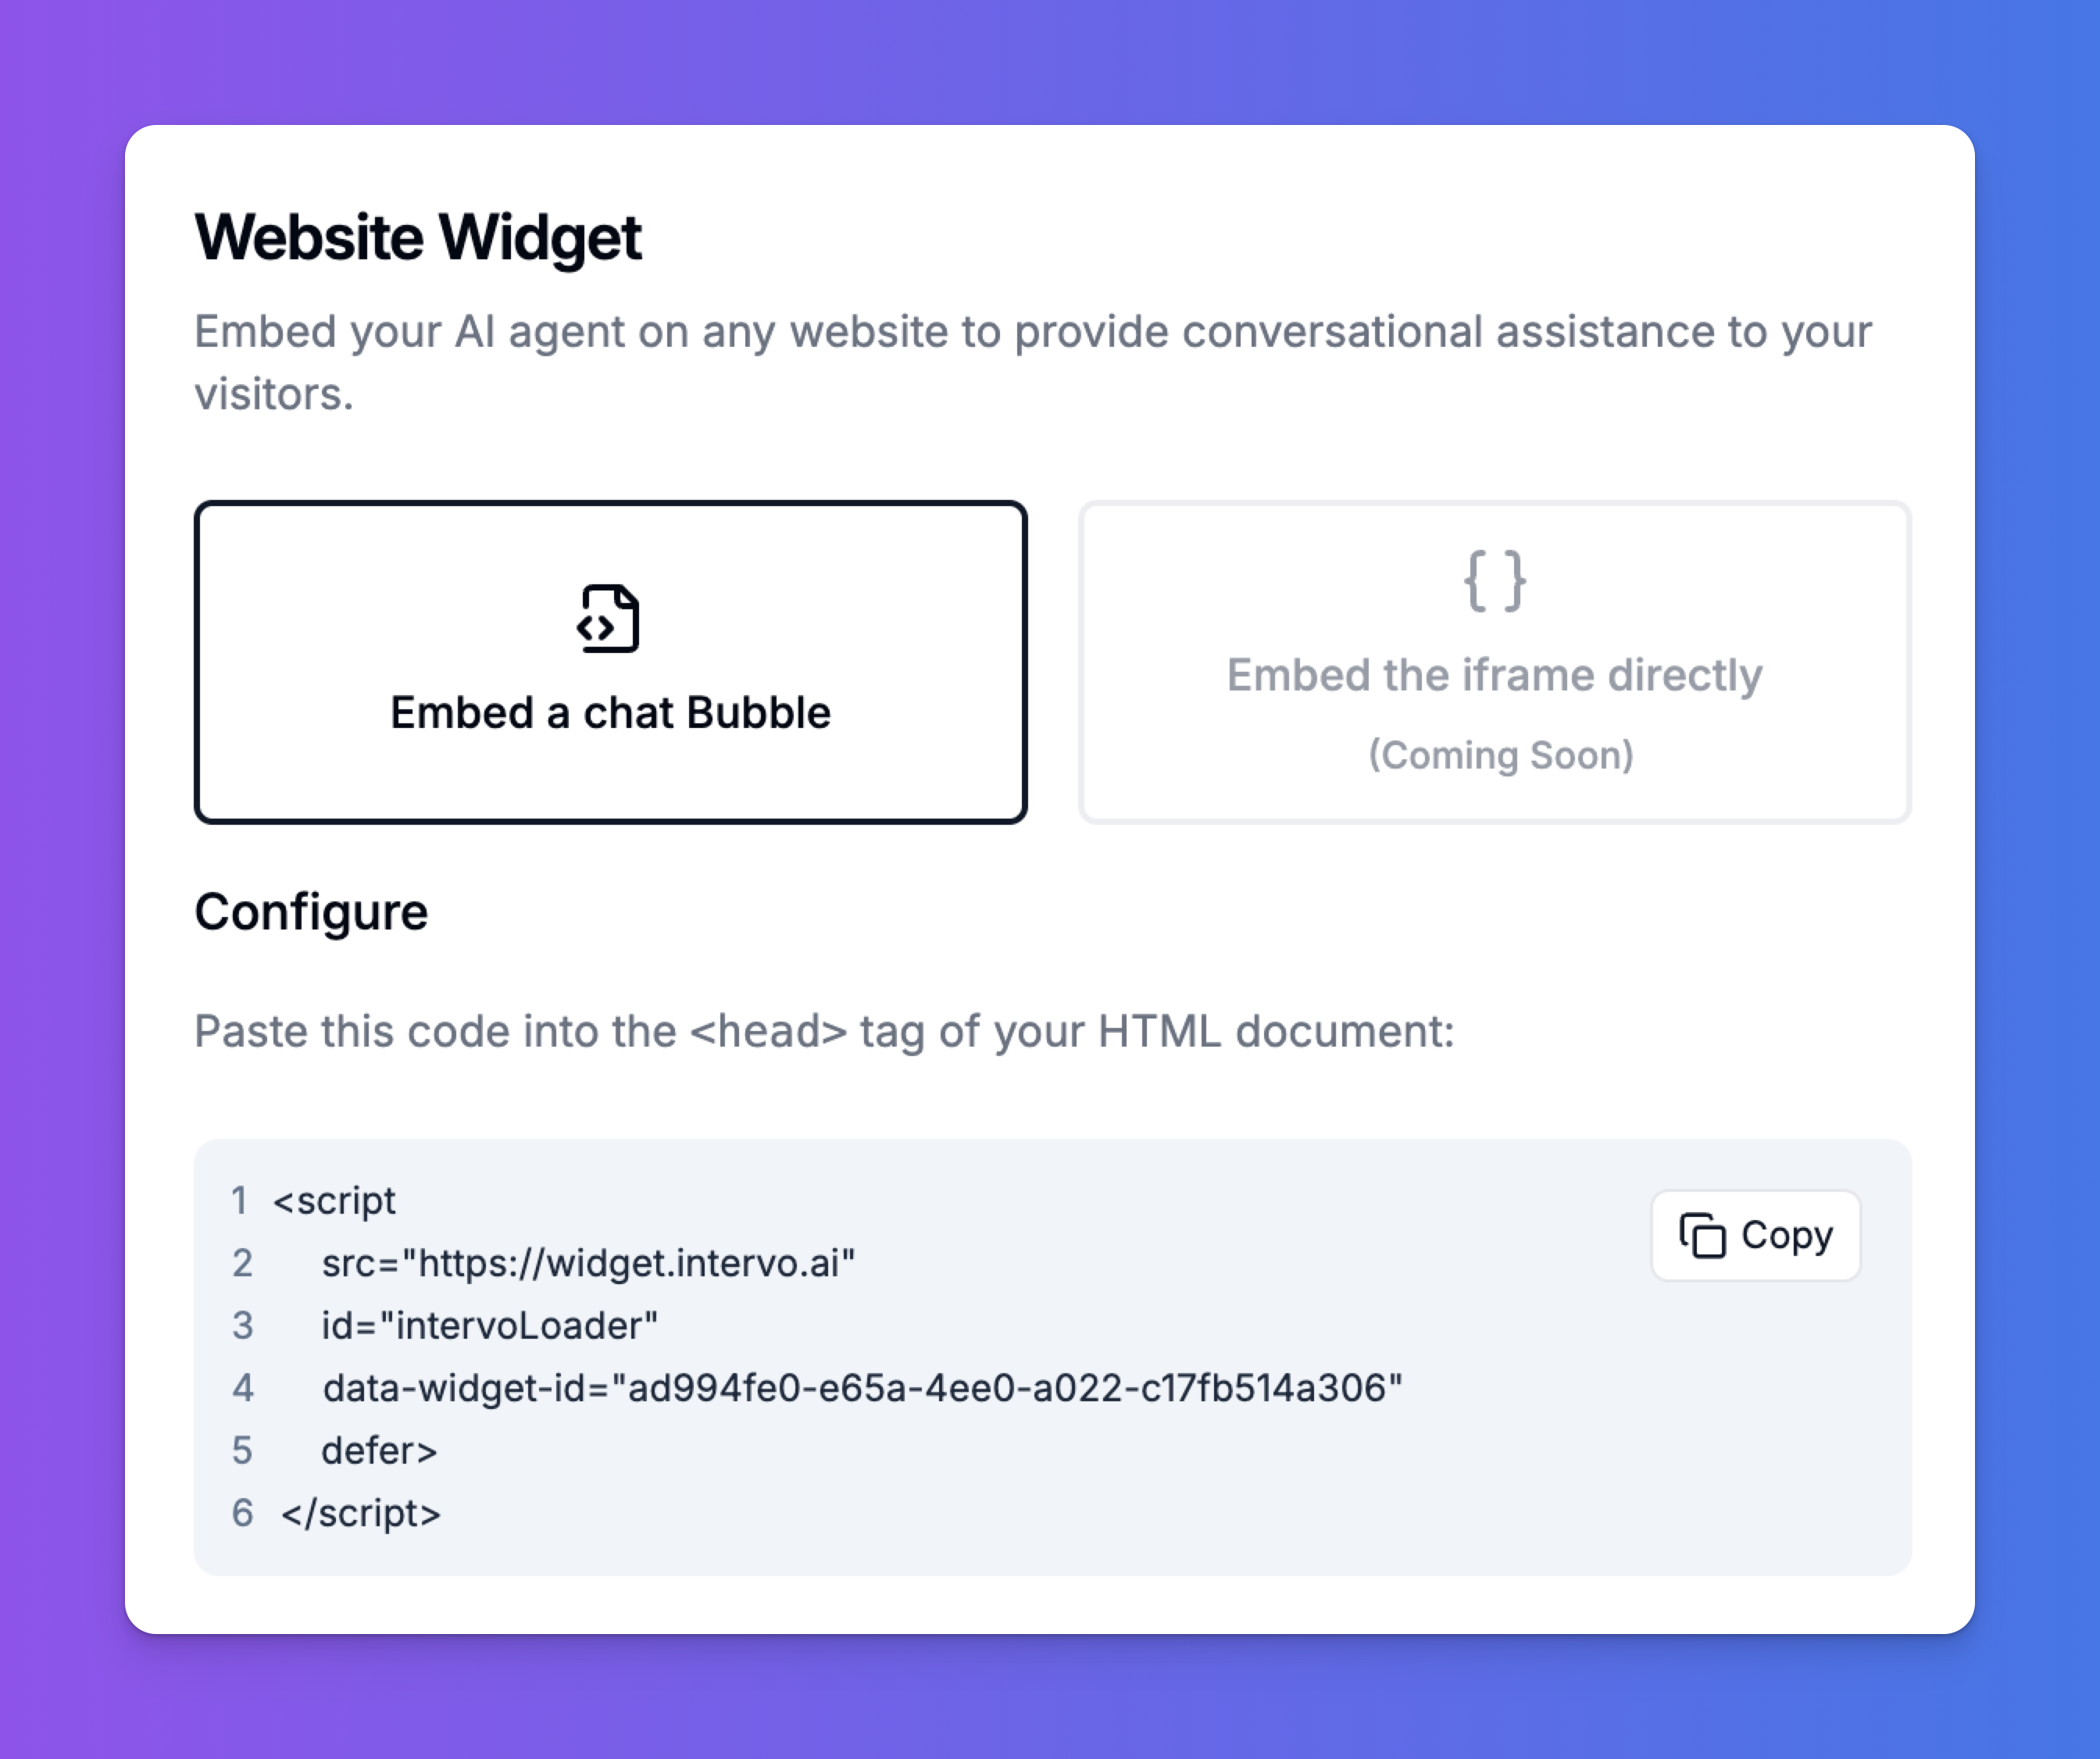
<head> section of your website’s HTML document. If you are using a platform like WordPress, Shopify, or Webflow, you can typically add this to a “custom code” or “header scripts” section in your site settings.
Once the script is added, the chat bubble will appear on your site, but you still need to customize its appearance and functionality.
2. Configuration: Customizing Your Widget
After getting the installation code, you will see the “Customize Widget” panel. This is where you control how the widget looks and what features it offers to your users.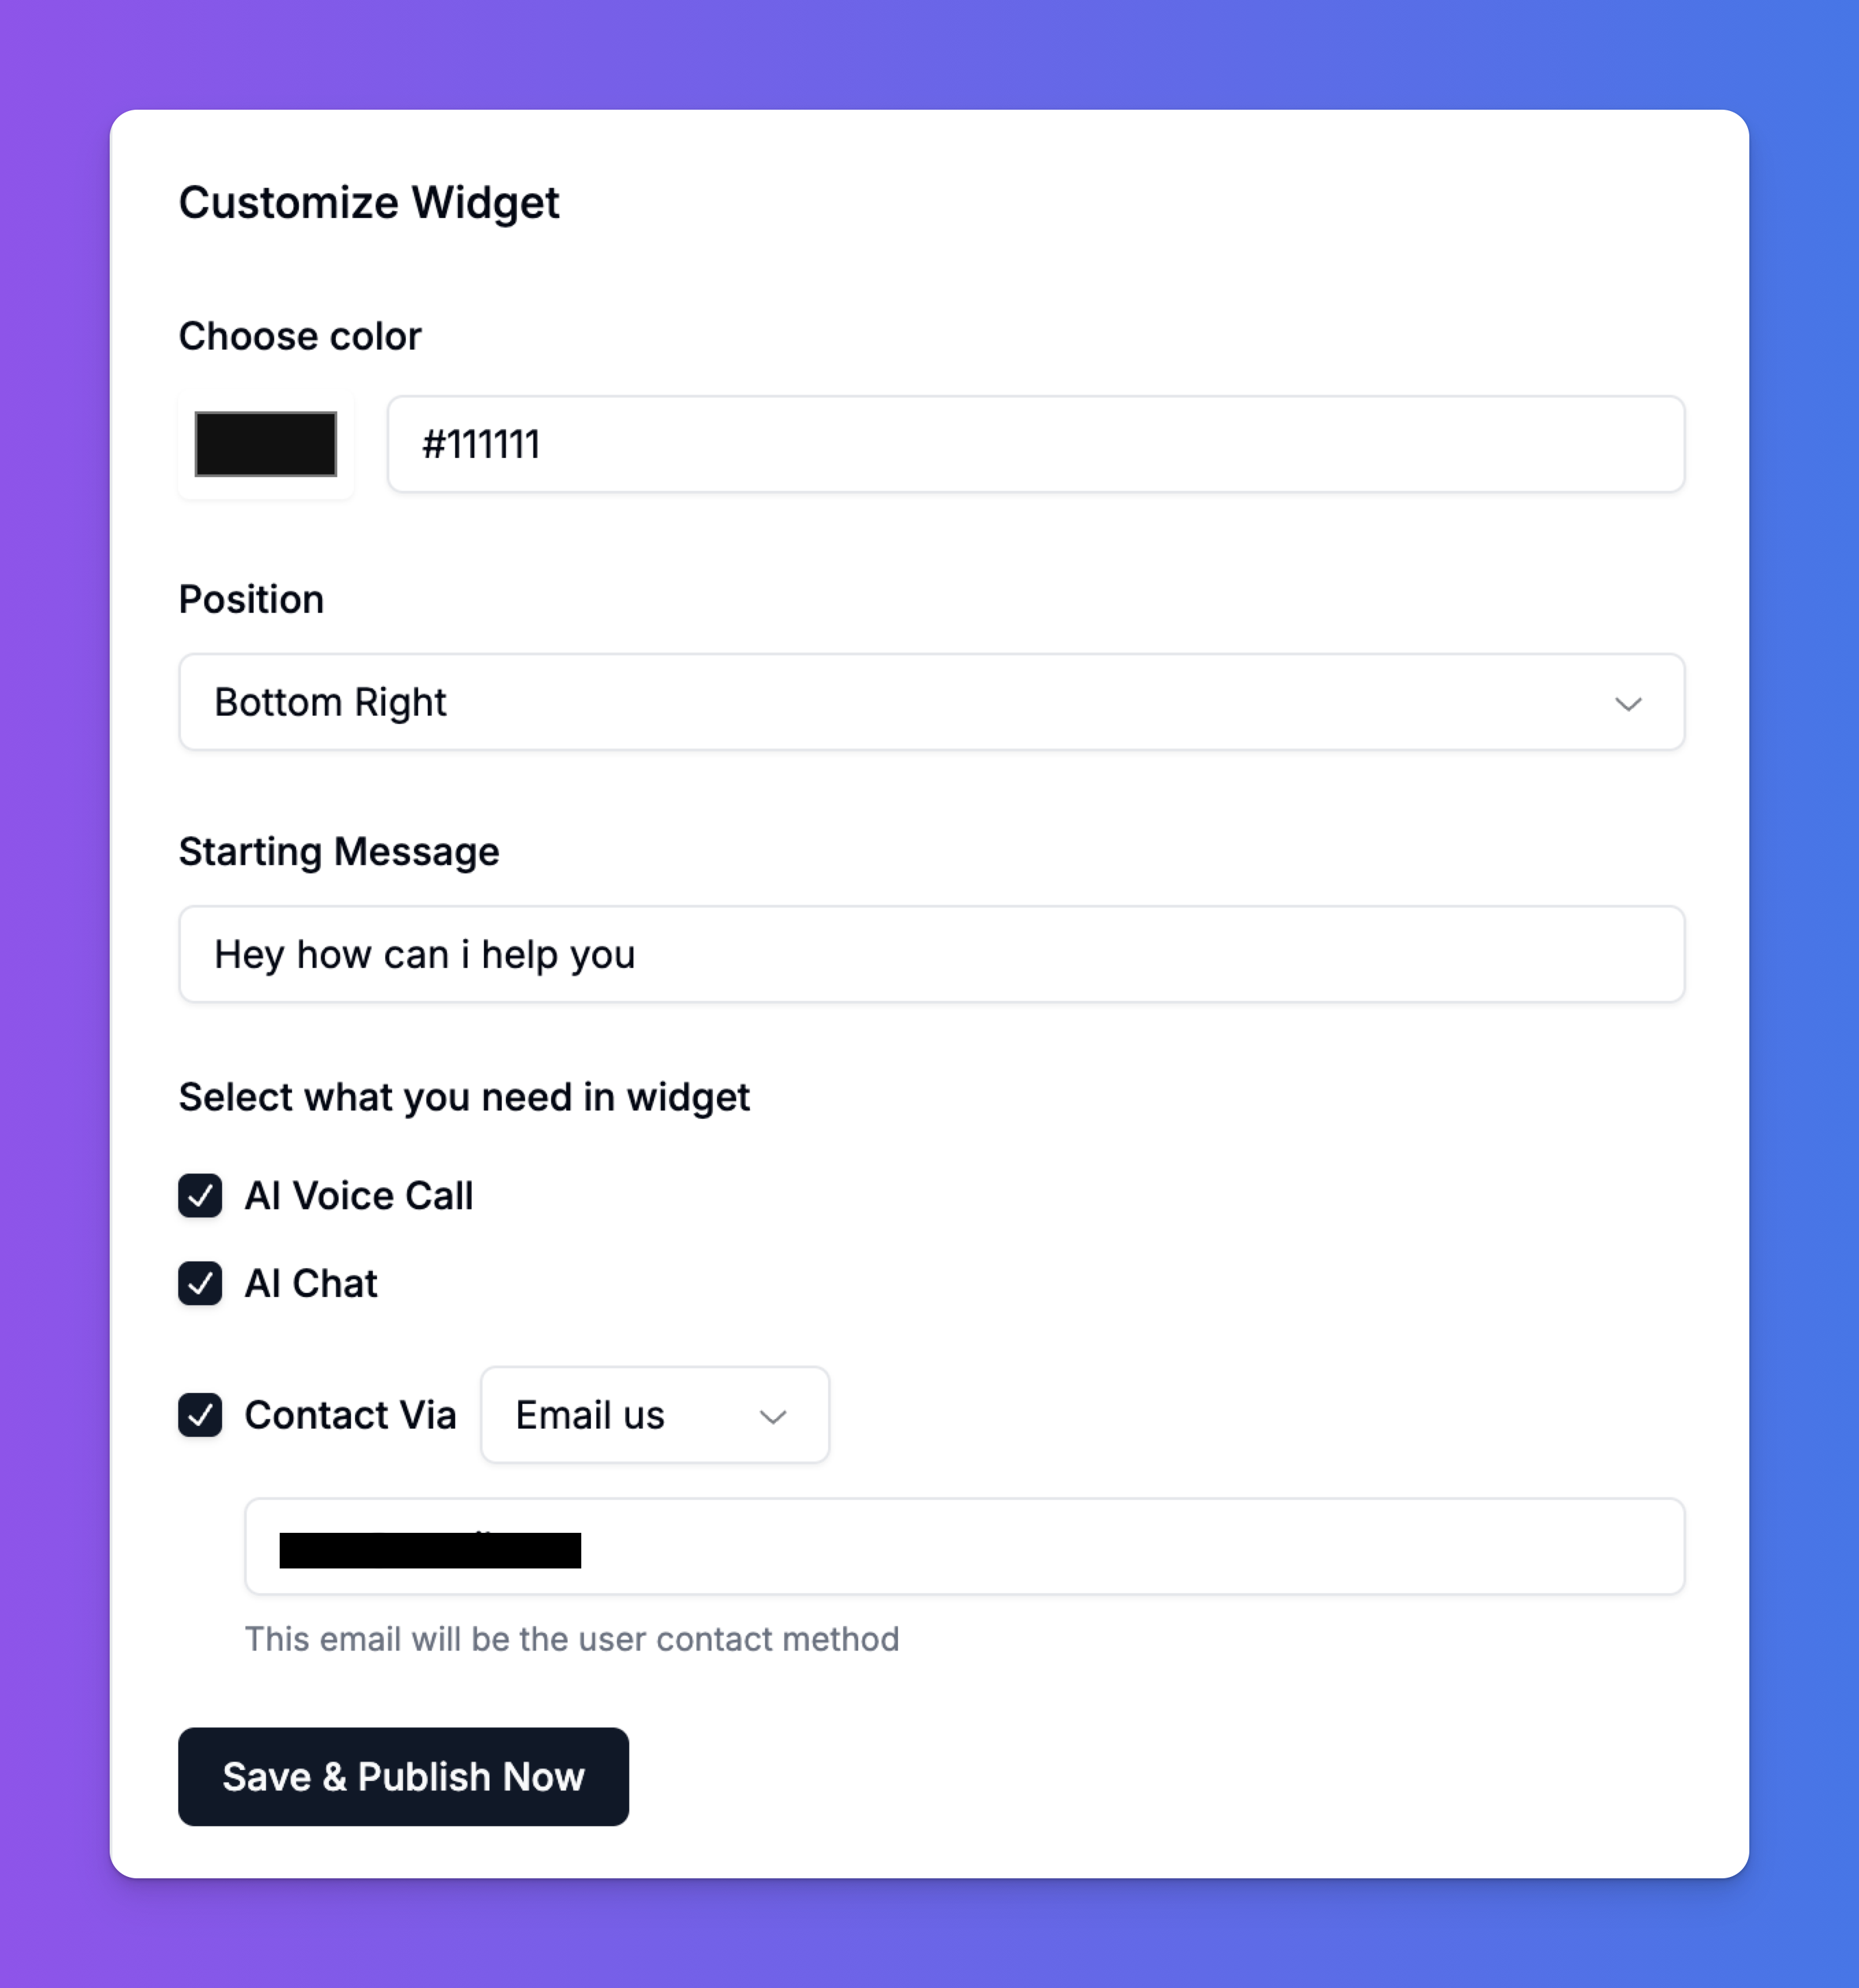
Appearance Settings
- Choose color: Set the background color of the chat bubble to match your brand. You can enter any hex color code (e.g.,
#111111). - Position: Choose where the chat bubble will appear on your website. The available options are
Bottom RightorBottom Left. - Starting Message: This is the greeting that appears above the interaction options inside the widget. Craft a short, welcoming message like “Hey how can I help you?”.
Functionality Settings
Select the ways users can interact with your agent. You can enable one or more of these options.- AI Voice Call: Check this box to allow users to have a full voice conversation with your agent directly through the widget. This is the core feature of Intervo.ai’s voice-first experience.
- AI Chat: Check this box to enable a traditional text-based chat interface for users who prefer typing.
Contact & Escalation Options
- Contact Via: This powerful feature provides an “escape hatch” for users who need to reach a human. You can enable a direct contact button within the widget. Select an option from the dropdown:
- Email us: Prompts the user to send an email. You must provide the destination email address.
- WhatsApp: Provides a link to start a WhatsApp chat. You must provide your WhatsApp contact number.
- Call us: Provides a phone number for the user to call.
- Text us: Provides a number for the user to send an SMS message.