Connecting Your Agent to the World: A Guide to the Phone Agent
Take your AI agent beyond the web and onto the global telephone network. By integrating with Twilio, you can assign a real phone number to your Intervo.ai agent, allowing it to answer customer calls 24/7, make outbound calls programmatically, and provide a seamless voice experience over the phone. This comprehensive guide will walk you through every step of the setup process, from configuring your Twilio account to making your first API-driven outbound call.The Big Picture: How it Works
The process involves three main stages:- Setting up Twilio: You will create a Twilio account, secure your API credentials, and purchase a phone number.
- Connecting Twilio to Intervo.ai: You will provide your Twilio credentials to Intervo.ai, allowing our platform to manage calls on your behalf.
- Assigning a Number and Making Calls: You will link your new phone number to your AI agent and learn how to handle both incoming and outgoing calls.
Step 1: Prerequisites - Setting Up Your Twilio Account
Before you can configure your Phone Agent in Intervo.ai, you need to complete two essential tasks in your Twilio account.
A. Create a Twilio Account & Find Your Credentials
First, you need an active Twilio account.- If you don’t have one, go to twilio.com and sign up.
- Once logged in, navigate to your main Account Dashboard.
- On the dashboard, you will find your Account SID and Auth Token. These are your master credentials. Keep them safe and do not share them publicly.
B. Purchase a Phone Number
Your AI agent needs a dedicated phone number.- In your Twilio Console, navigate to the “Phone Numbers” section.
- Go to
Manage > Buy a number. - Search for a number based on your country, desired capabilities (ensure it has Voice capability), and area code.
- Purchase the number. It will now be listed under your “Active Numbers.”
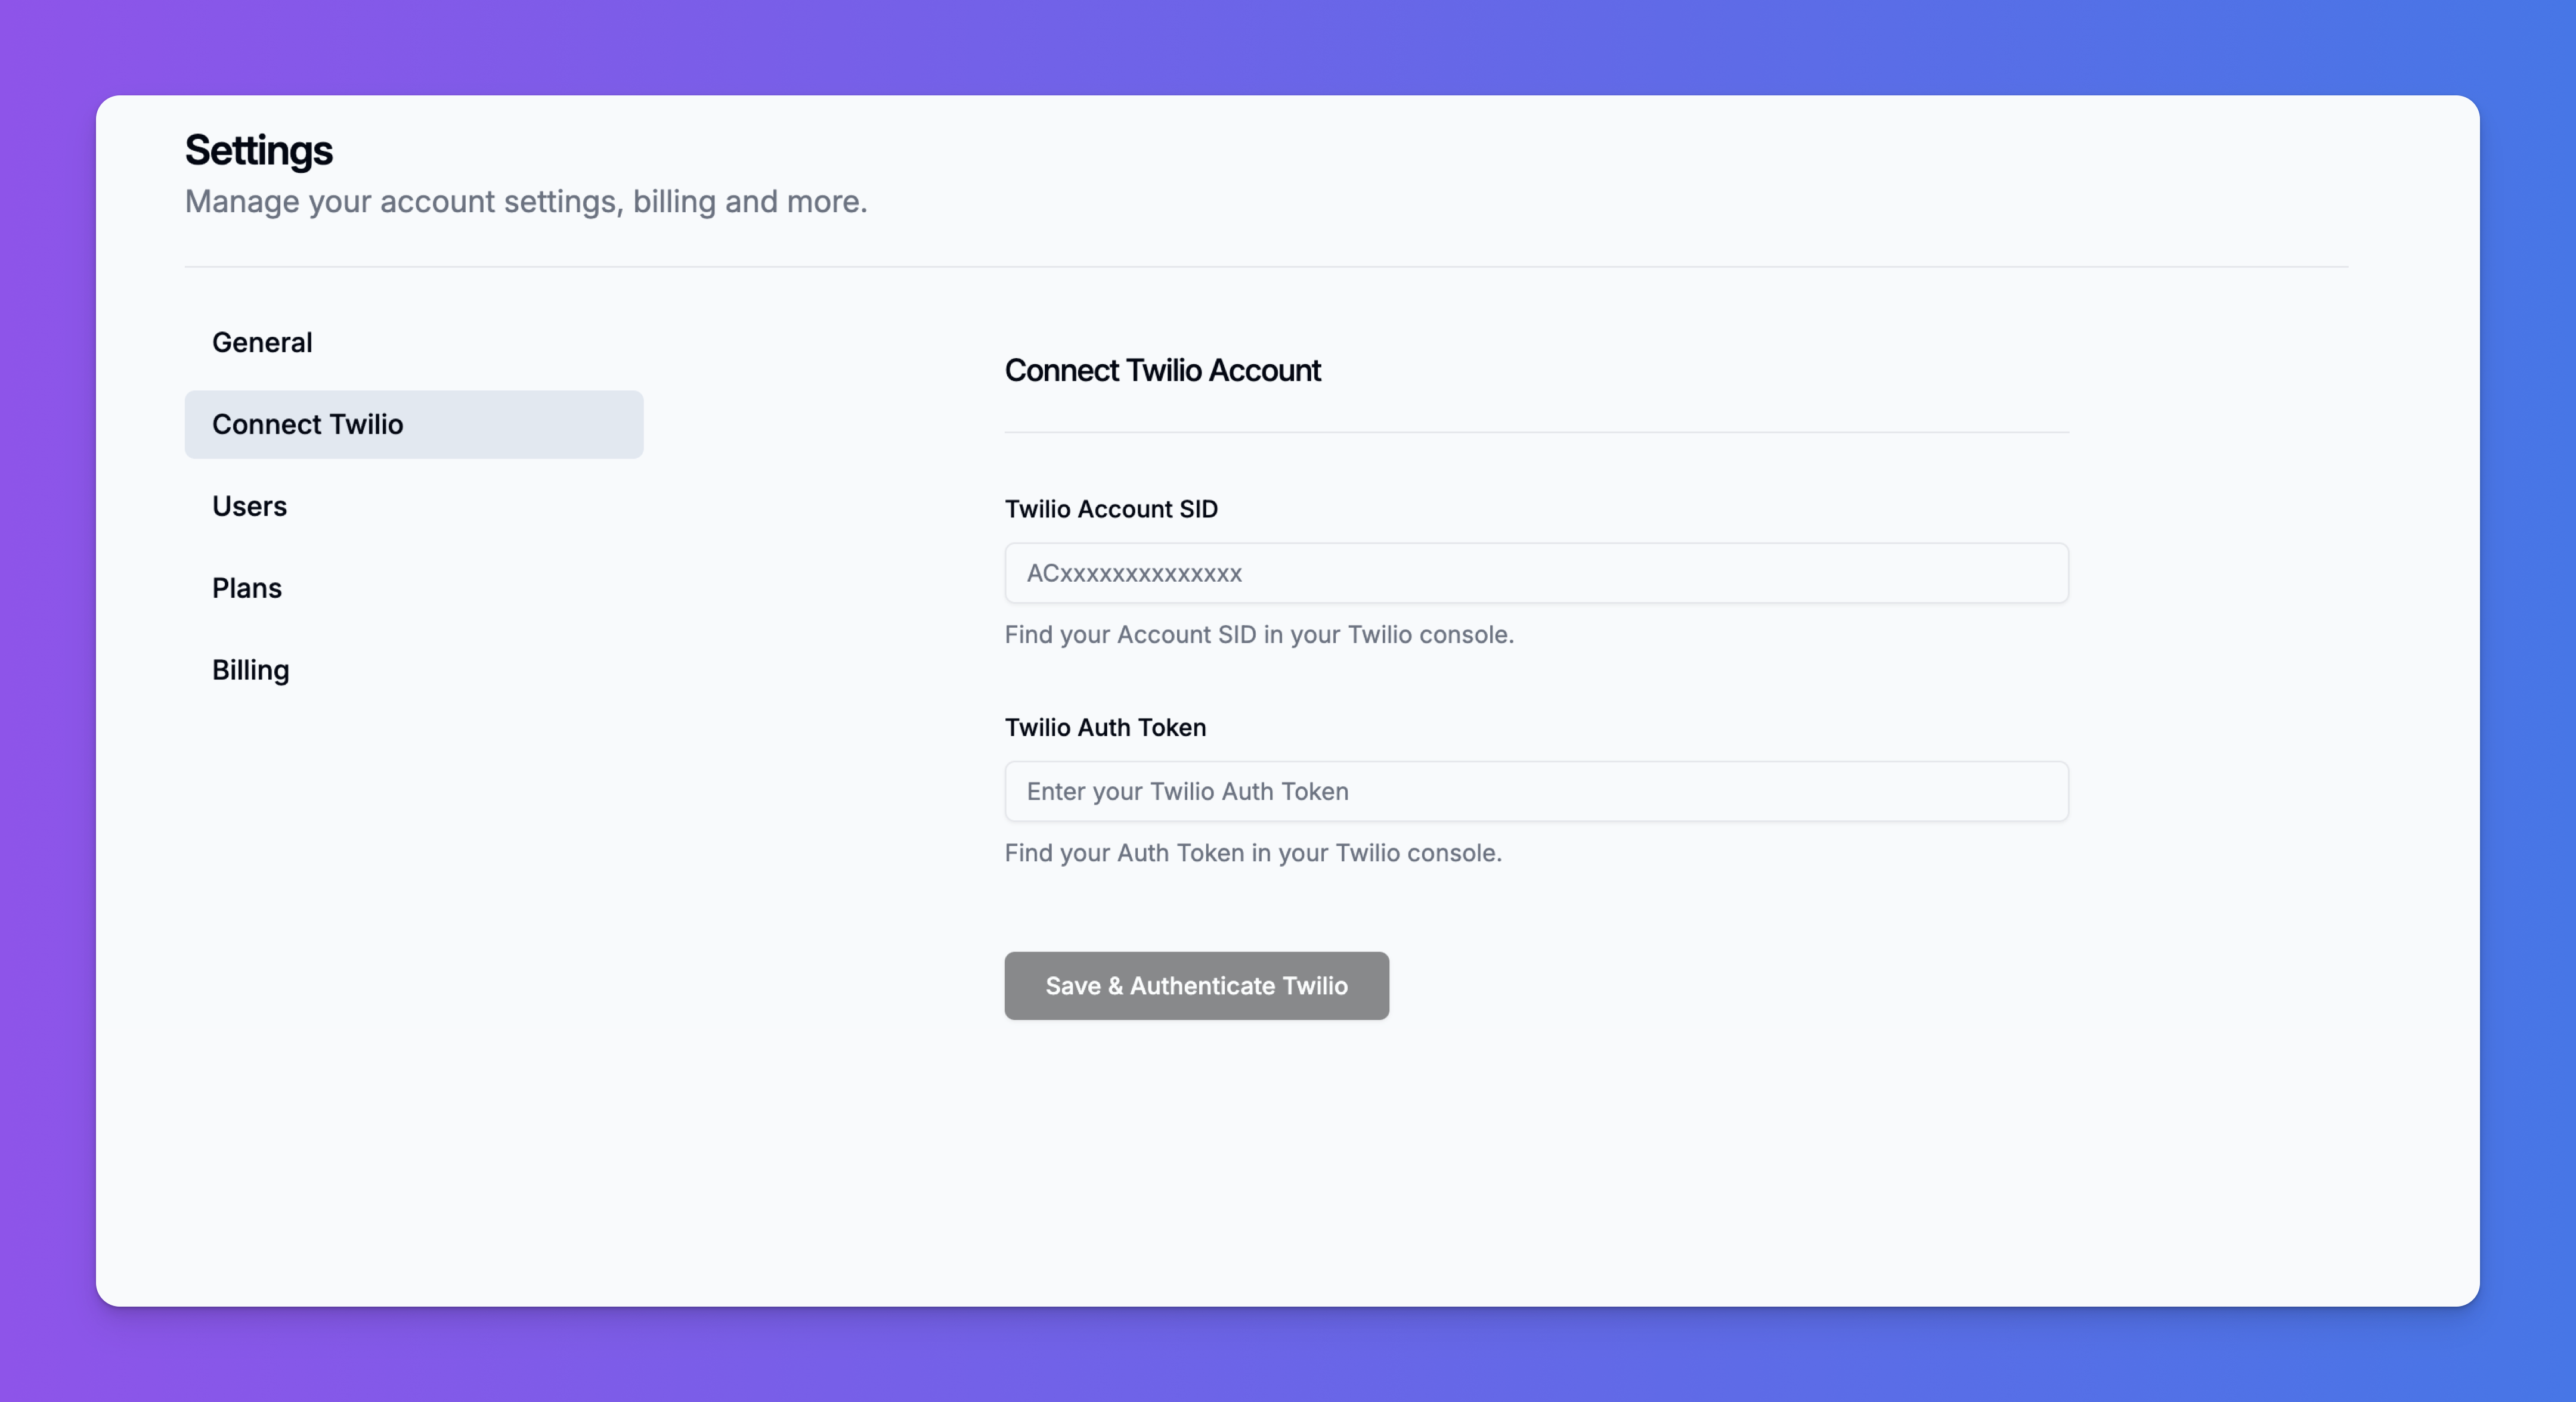
Step 2: Connecting Twilio to Intervo.ai
Now that you have your Twilio credentials and a phone number, it’s time to connect the two platforms.- In your Intervo.ai dashboard, navigate to the main Settings.
- Select the “Connect Twilio” tab.
- Carefully enter the Twilio Account SID and Twilio Auth Token that you retrieved in the previous step.
- Click “Save & Authenticate Twilio”.
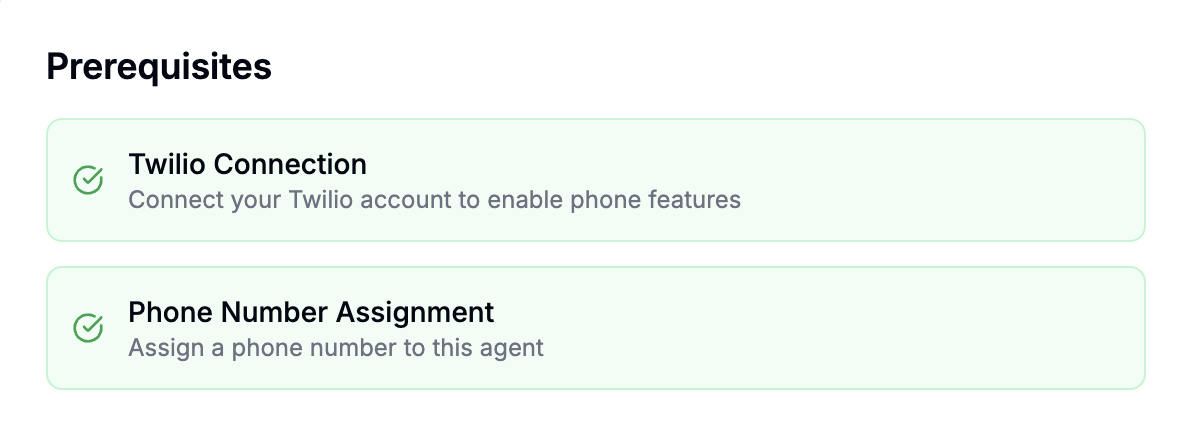
Step 3: Assigning a Phone Number to Your Agent
With Twilio connected, you can now assign your purchased phone number to a specific AI agent.- Ensure the agent you want to use has been configured and published from the Agent Playground.
- In the Intervo.ai dashboard, navigate to the Phone Numbers section (e.g.,
app.intervo.ai/default/phonenumber). - Click “Add New Phone Number”. A popup will appear.
- Select phone number: This dropdown will automatically list all the phone numbers you own in your connected Twilio account. Choose the number you want to use.
- Select Agent: Choose the published AI agent you want to answer calls on this number.
- Click “Add Phone Number”.

Step 4: Handling Incoming and Outgoing Calls
Incoming Calls (Automatic)
This is the easy part. The setup is already complete. When someone calls the Twilio phone number you assigned, Intervo.ai will automatically route the call to your AI agent. The agent will answer and begin the conversation using the introduction, knowledge, and workflow you configured in the Agent Playground.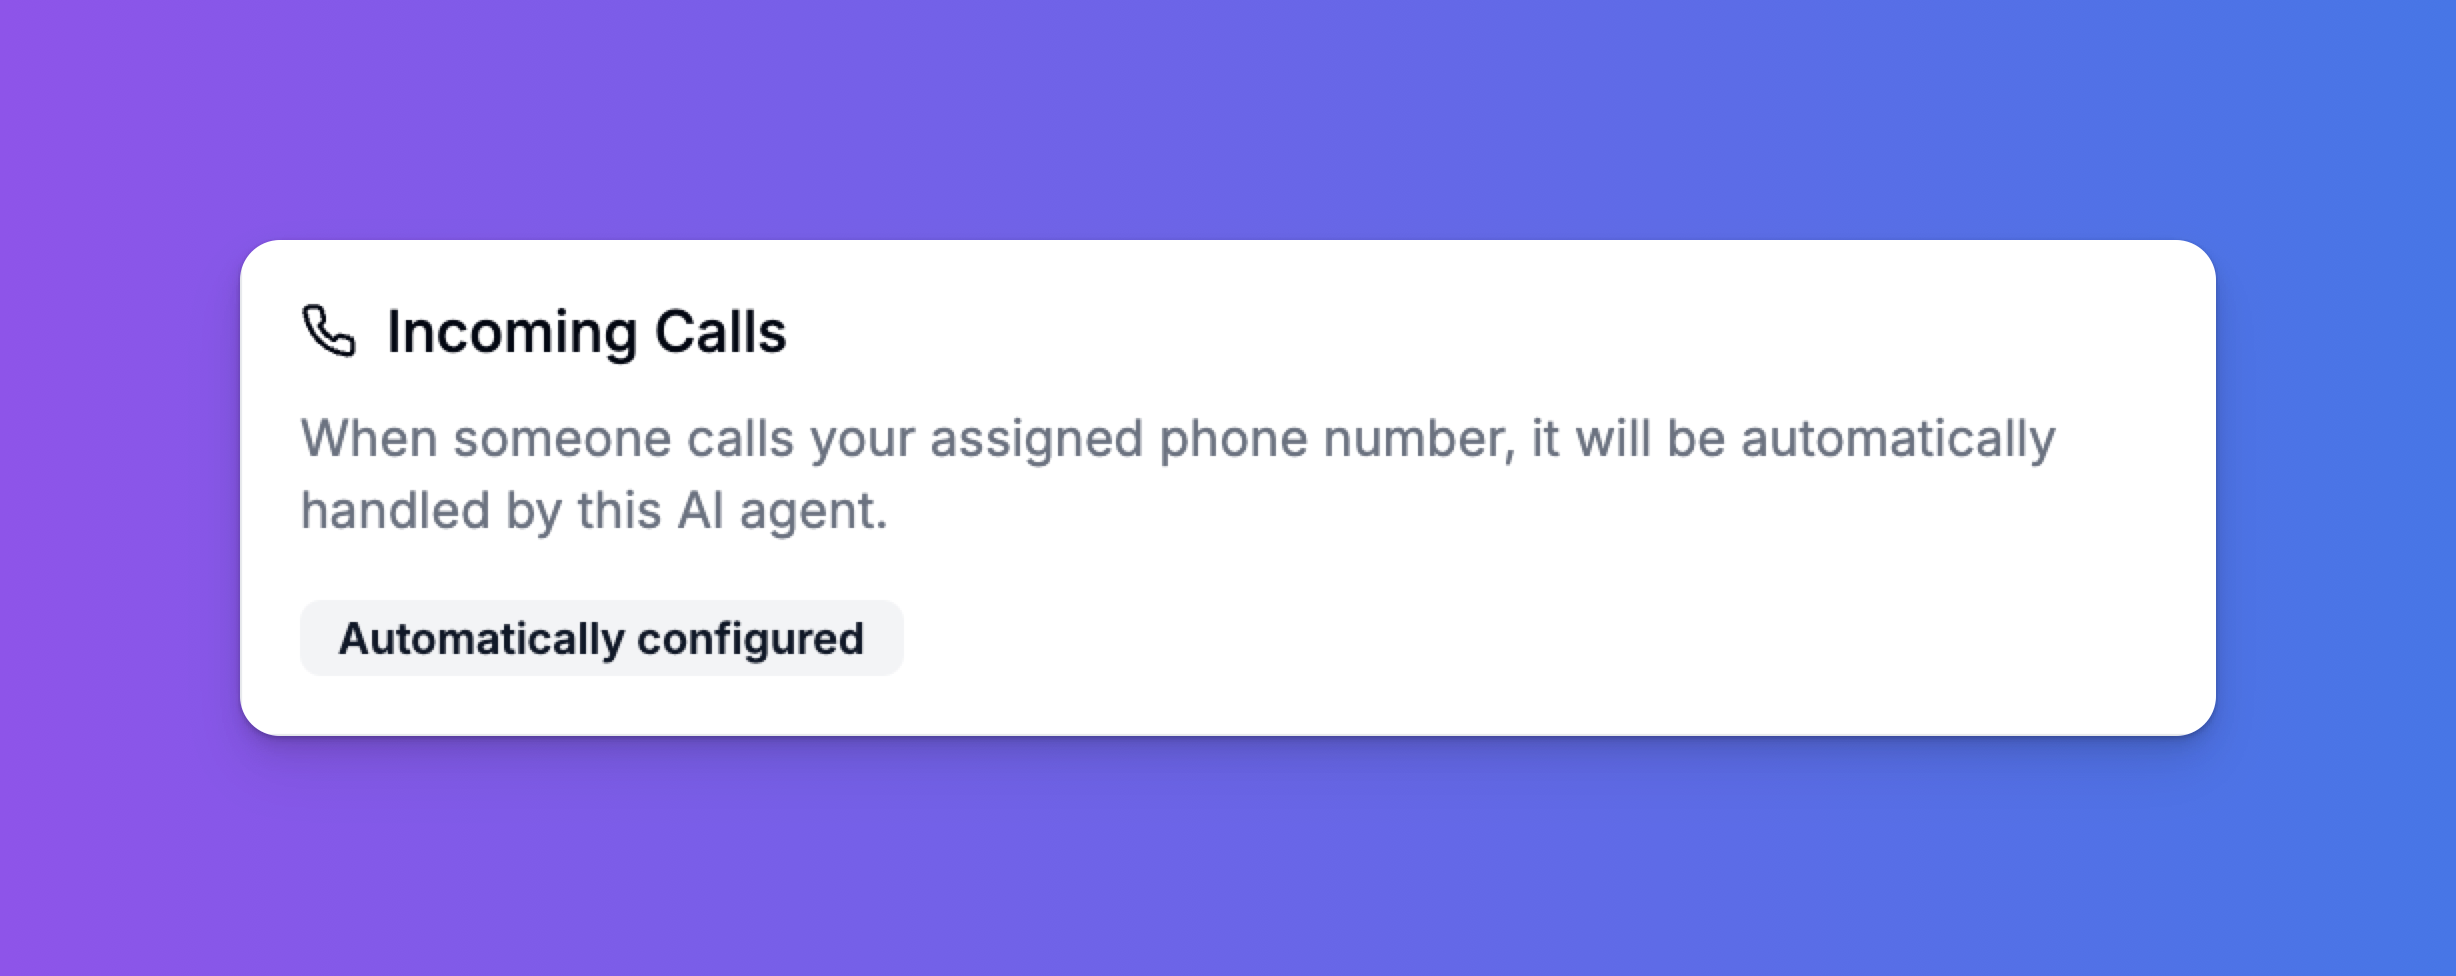
Outgoing Calls (via API)
To make your agent initiate a call, you need to use our Outgoing Calls API. This is perfect for proactive notifications, appointment reminders, automated surveys, and more. You will need two pieces of information from the Connect tab of your agent:- API ENDPOINT: The unique URL for your agent’s workflow.
- API KEY: Your unique, secret key for authentication.
Request Structure
- Method:
POST - URL:
YOUR_API_ENDPOINT?+QUERY_PARAMETERS - Headers:
x-api-key:YOUR_API_KEYContent-Type:application/json
Query Parameters
You can pass data to your agent by adding parameters to the request URL. This is useful for personalizing the call (e.g., “Hi John…”).| Parameter | Required | Description | Example |
|---|---|---|---|
phoneNumber | Yes | The destination phone number to call, including the country code. | +1234567890 |
firstName | No | The first name of the person being called. | Jane |
lastName | No | The last name of the person being called. | Doe |
email | No | The email address of the person being called. | jane.doe@example.com |
country | No | The country of the person being called. | United States |
callType | Yes | Must be set to outbound. | outbound |
You can also add any custom parameters you need (e.g., &orderId=12345). Your agent can be configured to use this data in its conversation.
Example API Call
Here are examples of how to initiate an outbound call usingcurl and JavaScript.
curl Example:
Javascript Example: